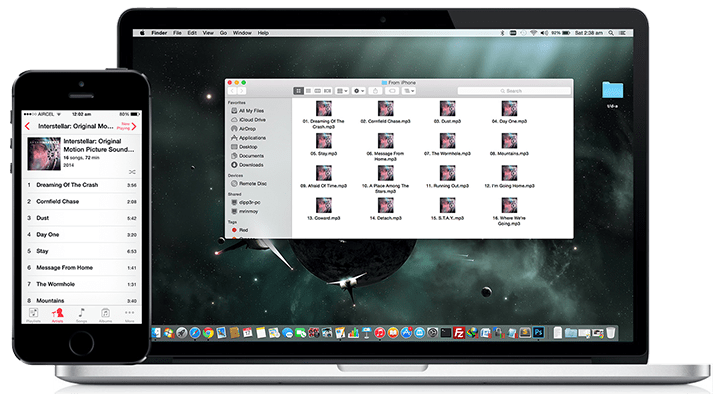
The official method for transferring music from your computer to an iPhone is to sync it via iTunes. But iTunes sync doesn’t allow you to transfer music from iPhone back to a computer. This fact may prove to be a cause of concern for some of the iOS users if they want to transfer music from their iPhone to computer. Other popular smartphone platforms like Android or Windows Phone support MTP USB connection, and you can easily connect these devices to any computer and transfer files between them. But with an iPhone, the device contents cannot be accessed without iTunes. And even if you find a way to read the contents, there is no easy way to copy music from the iOS device to the computer. In this article, we are going to demonstrate how you can transfer music from iPhone to computer.
Music present on your iPhone broadly belong to two categories:
- Music purchased from iTunes Store: If you have purchased music from iTunes Store on your iPhone, you can easily transfer them to your computer using iTunes on your computer.
- Music from other sources: If your iPhone music library contains songs not purchased from iTunes, you can transfer them to your Mac or PC with the help of third party iOS apps over WiFi or iTunes. You may even use third party desktop clients that allow you to browse your iPhone music library and save them to your computer.
Note: To transfer music from iPhone to a computer using iTunes, you have to authorize the computer using your Apple ID. Hence it is recommended that you use a computer that you either own or trust.
Transfer purchased music from iPhone to computer
To transfer music purchased in iTunes from your iPhone to computer, follow the steps below:
- Connect your iPhone to the computer. The device icon should appear in iTunes having a specific device name (for example, “David’s iPhone”).
- If you are on Windows and don’t see the iTunes menu bar, press the Alt key to temporarily reveal it. On Mac, menu bar should be visible on top of the screen as usual.
- Go to File >> Devices >> Transfer Purchases from <Device Name>. Purchased music from the connected iOS device should be transferred to the computer.
The above steps will only copy your iTunes purchases from iPhone to your computer. Music downloaded from any other sources will not be copied.
Transfer non-purchased music from iPhone to computer
You may transfer music that was not purchased from iPhone to your computer using either iOS apps (on iPhone) or third party desktop clients (on computer).
Transfer music from iPhone to computer using iOS apps
For this, you will need to use apps that provide two specific abilities:
- Access to iPhone Music Library.
- Support for sharing files with the computer.
Very few apps on the App Store provide access to music library. And following the latest App Store policy changes, none of the apps we found could import music from the library to their local storage, and hence couldn’t provide file sharing via WiFi or iTunes. But some apps allow you to access the music library and open music files in other apps via the Open In menu.
If you are a Mac user with OS X Yosemite (10.10) or above and have iOS 8 installed on your iPhone, you only need one iOS app that allows access to the iPhone music library along with the Open In option. OS X Yosemite supports AirDrop file transfer between Mac and iOS devices, and once you access your music library music using that app, you can directly share them via AirDrop from the Open In menu.
If you’re a Windows user, or if your Mac OS X / iOS version does not meet AirDrop requirements (OS X 10.10+ and iOS 8+), you’ll not be able to use AirDrop. In that case, you can transfer your music from iPhone to computer either over WiFi or through iTunes (USB).
One drawback of the ‘Open In’ feature of iOS is that you can only open files in other apps one at a time. Thus, for transferring a large number of music files from your iPhone to a computer, a third party desktop client would be more suitable, as it would allow you to transfer multiple files at once. But if you only want to transfer a limited number of music files, sharing them via iOS apps is more preferable.
Transfer music from iPhone to computer via AirDrop
Follow the steps below to transfer music from iPhone to computer via AirDrop:
- Turn on AirDrop in iPhone from the Control Center.
- On your Mac, go to AirDrop in Finder and turn on WiFi and Bluetooth (if turned off).
- Set AirDrop discovery to ‘Everyone’ on both devices.
- Download and install iTransfer on iPhone from the App Store.
- Open iTransfer and choose Music Library. Now browse the library by Albums, Artists, Songs, etc. to find the music file you want to transfer to computer.
- Tap on Select in the top right corner to enable selection mode.
- Select a song you want to send to the computer and tap the Open In option at the bottom right corner of the screen.
- When the Mac user shows up in iPhone’s AirDrop section of the Open In menu, tap on the user’s icon to send the selected file to Mac.
Transfer music from iPhone to computer over WiFi
Since no single app can access the iPhone music library as well as provide WiFi file sharing at the same time, we have used two separate apps to achieve the same goal:
- One that allows access to the music library along with the “Open In” feature.
- Another (file manager) app that allows users to share local files over WiFi.
In this demonstration, we’ll use iTransfer and Documents app to share music from the iPhone library to a computer directly over WiFi. The following steps will guide you to send music files from iPhone to computer over WiFi:
- Ensure that the iPhone and the computer are connected to the same WiFi network.
- Download and install iTransfer and Documents app on iPhone from the App Store.
- Open iTransfer and choose Music Library. Now browse the library by Albums, Artists, Songs, etc. to find the music file you want to transfer to computer.
- Tap on Select in the top right corner to enable selection mode.
- Select a song you want to send to the computer and tap the Open In option at the bottom right corner of the screen.
- Choose Documents from the list of shareable apps. The selected file will now open in the Documents app and it will be copied to Documents’ local storage.
- Repeat steps 5 and 6 for all the songs you want to copy to your computer.
- In the Documents app, tap on the Menu button (three horizontal bars) at the top left corner.
- Tap on Settings >> WiFi Drive and turn on Enable Drive toggle. An IP address will now be indicated on the screen. Leave this page open until the transfer operation is completed and ensure that the screen does not get locked.
- On your Mac, open Finder and select Go >> Connect to Server. Type the IP address indicated in the Documents app in the field provided and click Connect. Choose Connect as Guest and click on Connect again. On the iPhone, tap on Allow when a pop up appears asking for permission to allow access. The WiFi Drive will open up in Finder.
- If you have Windows, go to Computer >> Tools menu >> Map Network Drive (for Windows 8, go to This PC >> Computer tab >> Map Network Drive at the top of the Explorer window). Choose a drive letter (Z: by default). Type the IP address in the Folder field and click Finish. On the iPhone, tap on Allow when a pop up appears asking for permission to allow access. Now browse the WiFi Drive in Windows Explorer.
- Copy the music files you want to keep and save them to a local folder.
Transfer music from iPhone to computer using iTunes
If WiFi transfer is not suitable, you may even transfer music from iPhone with iTunes by connecting it to a computer via USB. We will use the app file-sharing option available in iTunes. The following steps will guide you to do so:
- Download and install iTransfer and Documents app on iPhone from the App Store.
- Open iTransfer and choose Music Library. Now browse the library by Albums, Artists, Songs, etc. to find the music file you want to transfer to computer.
- Tap on Select in the top right corner to enable selection mode.
- Select a song you want to send to the computer and tap the Open In option at the bottom right corner of the screen.
- Choose Documents app from the list of shareable apps. The selected file will now open in the Documents app and it will be copied to Documents’ local storage.
- Repeat steps 4 and 5 for all the songs you want to copy to your computer.
- Once the files are in Documents app’s local storage, you have to move them to “iTunes Files” folder, so that they are accessible in iTunes.
- In Documents app, tap on the Edit button in the top right corner, and select the files you want to move into “iTunes Files” folder.
- Tap Move option at the bottom of the screen and choose iTunes Files from the list of available folders.
- Tap the Move button at the top right corner. This will move the selected files to “iTunes Files” folder.
- Now connect the iPhone to the computer.
- Launch iTunes and wait for it to detect your device.
- Once detected, click on the iPhone button at the top right corner of the iTunes window.
- Go to the Apps tab, and scroll down to the File Sharing section.
- Scroll the app list on the left side and select Documents. A list of files stored in its local storage is displayed on the right pane.
- Select the files you want to copy to the computer and click on the “Save To” button. Browse to your preferred location and click Save. The selected files will be saved to computer. Alternatively, you may also drag music files from the shared file list and drop them in a folder on your computer.
Transfer music from iPhone to computer using third party desktop clients
Unlike the usual MTP supported devices, you need special desktop clients to copy music from your iPhone to a computer. Luckily, there are many third-party desktop apps that allow you to transfer music from your iPhone library to computer. And one advantage of these apps is that you can make multiple file selections at once, enabling you to make bulk transfers. You can also transfer music from your iPhone to any computer. So if you want to transfer an MP3 file from your iPhone to a friend’s computer, these desktop applications will help you to do so.
These applications usually work in a similar way – You connect the iPhone to a computer via USB and launch the application. The application automatically detects the iPhone and lets you browse through the contents of the phone. You can then select any content (in this case, music) and choose to save it to the computer in a particular location.
List of desktop clients
iExplorer – iExplorer helps you transfer your music from iPhone to iTunes on your computer keeping the ratings, play counts, metadata, etc. intact. The video below demonstrates the use of iExplorer to backup your music from iPhone. It is available for Mac and Windows.
PhoneTrans – PhoneTrans from iMobile is a manager for iOS devices that allows you to transfer your music between your iPhone and computer (Mac or PC).
CopyTrans – CopyTrans is an easy solution to transfer music, videos, apps, playlists, etc from iPhone, iPad and iPod to PC or iTunes. Only available for Windows.
PhoneView – PhoneView is a content manager for iOS devices which you can try out for free. It is only available for Mac OS X.
SynciOS – This is an iOS device management app with option to transfer media from iOS device to PC. It is available only for Windows. This tutorial demonstrates how to use SynciOS for Windows to transfer music from iPhone to a Windows PC.
iTransfer – iTransfer lets you transfer music, videos, photos, etc. from an iOS device to a Mac or PC.
Xilisoft iPhone Transfer – Xilisoft iPhone Transfer is a iPhone management tool that allows you to seamlessly sync content between iPhone and Mac / PC. You can backup your music library from an iPhone to computer using this software.
TouchCopy – TouchCopy is a recovery tool that can backup and restore your iTunes music, playlists, photos and videos from iPhone, iPad or iPod back to your computer. It is available for both Mac and Windows.
Did you find this article helpful? If you have any useful information to share with us regarding this article, just leave a comment below.