With people overflowing across different social networks, it’s quite obvious that your address book is almost flooding with contacts. And in your quest for staying up to date with the latest technology trends, switching among different smartphones becomes really difficult when it comes to transferring your assets from one phone to the other. And one of the most important assets is your contacts. Without your contact list, your new phone is quite useless for texting, making calls, and using apps that require access to your contacts (like WhatsApp, Viber and the likes).
Manually saving individual contacts is time consuming and often not a very good idea in case your Address Book is huge. In this article, we’ll explore ways to transfer your contacts between different Smartphone platforms easily. So if you are looking to switch between an iPhone, Android or Windows Phone, this article might come in handy.
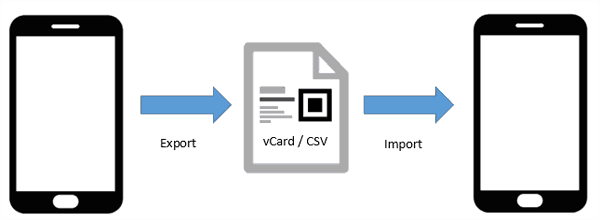
How to Export contacts from a Smartphone
In order to transfer contacts to your new phone, you must first export them from the old one. Here’s how you export contacts from different mobile platforms.
Export contacts from iPhone
Contacts can be exported from iPhone to computer either via iCloud or iTunes.
Via iCloud
You can sync and export your manually created contacts via iCloud. For this you need to turn on iCloud Contacts sync from your iPhone.
- To turn on iCloud Contacts Sync, go to Settings >> iCloud >> Turn on sync for Contacts.
- From your web browser, open iCloud.com, log in to your account and open Contacts.
- Click on Settings (Gear icon) at the bottom of the screen and choose Select all Contacts.
- Click on Settings (again) >> Export. Now download your Contacts in vCard (.VCF) format.
Note: iCloud will only backup contacts you have manually saved on your iPhone. It does not save Contacts synced from other online accounts.
Via iTunes
You can back up your manually created contacts by syncing your device in iTunes. For syncing contacts via iTunes, first you need to turn off iCloud Contacts sync. To do so, go to Settings >> iCloud >> Turn off sync for Contacts.
Now, when you connect your iPhone to iTunes, click on the iPhone tab in iTunes and go to Info tab. Here, you will now be able to sync Contacts to your computer (as Contact card).
Note: This option won’t be available in iTunes unless iCloud Contacts backup is turned off. You can either use iCloud or iTunes to export your contacts, but not both.
Export contacts from Android
Contacts can be exported to the computer in vCard format. Follow the steps below to export your contacts from an Android to PC.
- Open Contacts App on your Android phone and tap on the Menu key.
- Select Import/Export and choose the location you want to export contacts from (i.e. your SIM Card, Email Account, Phone Memory or SD Card).
- Click Next and choose Phone Memory / SD Card to save your contacts to external storage.
- Click Next and choose the contacts you want to export.
- When selection is done, tap on the Copy icon on the bottom right corner.
- You will be notified that the contacts are about to be saved to a specific file.
- Click OK and wait for the contacts to be exported.
The contacts will be exported to your Phone Memory / SD Card in vCard format. You can access the particular vCard file from your computer. Just connect the phone to your computer and copy the vCard from your phone.
Export contacts from Windows Phone
Windows Phone allows you to export your contacts in Comma Separated Values (CSV) format. Before exporting your contacts, make sure your phone is synced with your Microsoft Account. Go to Settings >> Emails + Accounts on your Windows Phone and ensure you are signed in to your Microsoft Account and that it’s synced up to date.
- From your Computer, go to Outlook.com and sign in to your Microsoft Account.
- Click on the arrow next to the Outlook logo on the top left corner and Choose People.
- Click on Manage from People menu and click on Export.
- Download the CSV file to your computer.
How to import contacts to a Smartphone
After you have successfully exported all your contacts, the next thing is to put them into your new phone. The following are the ways to import your exported-contacts to the new phone.
Import contacts to iPhone
You can import contacts to iPhone via iCloud or iTunes.
Via iCloud
iPhone lets you to import contacts from your iCloud. For this you need to turn on Contacts sync to iCloud. To turn on iCloud Contacts Sync, go to Settings >> iCloud >> Turn on sync for Contacts.
- From your web browser, open iCloud.com, log in to your account and open Contacts.
- Click on Settings (Gear icon) at the bottom of the screen and choose Select all Contacts.
- Click on Settings again >> Import. Now choose a suitable Contacts file in vCard (.VCF) format.
Once the contacts are uploaded, sync your iDevice with iCloud.
Via iTunes
You may also restore your manually created contacts from your Windows contacts by syncing your device via iTunes. For syncing contacts via iTunes, first you need to turn off iCloud Contacts sync. To turn off iCloud Contacts Sync, go to Settings >> iCloud >> Turn off sync for Contacts.
Now, when you connect your iPhone to iTunes, click on the iPhone in iTunes and go to Info tab.
Here, you will now be able to sync Contacts from your computer having vCard contacts.
Note: This option won’t be available in iTunes unless iCloud Contacts backup is turned off. You can either use iCloud or iTunes to import contacts, but not both.
Import contacts to Android
You can import your contacts into your Android Phone from a previously backed up vCard file.
- Transfer the vCard file to your Phone Memory / SD Card from your computer.
- Open Contacts App and tap on the Menu key.
- Select Import/Export and choose Phone Memory / SD Card as the source of import.
- Click Next and choose the location to save your imported contacts.
- Click Next and choose the contacts you want to import.
- When selection is done, tap on the Copy icon on the bottom right corner.
- You will be notified that the selected contacts are ready to be imported.
- Click OK and wait for the contacts to be imported from the vCard file.
Import contacts to Windows Phone
In order to import contacts from a vCard file to your Windows Phone, you need to convert the file to CSV format first since vCard is not natively supported in Windows. See the next section to find how to convert a vCard into CSV.
Once you have your contacts in CSV format, you are now ready to import contacts to your Windows Phone.
- From your Computer, go to Outlook.com and sign in to your Microsoft Account.
- Click on the arrow next to the Outlook logo on the top left corner and Choose People.
- Under Add people to your contact list, choose Import from file.
- Choose Microsoft Outlook (using CSV) radio button.
- Click on Choose file button and select the CSV file.
- Click on Import Contacts to add your contacts to your Microsoft Account.
- On your Windows Phone, go to Settings >> Emails + Accounts and ensure you are signed in to your Microsoft Account.
- Contacts will be synced from your Microsoft Account to your Windows Phone.
Convert CSV file into vCard and vice-versa
Different phone operating systems support different contact formats, so there is a possibility that your exported contacts are not compatible with the new phone. For instance, Windows Phone supports contacts in CSV format while iPhone and Android support vCards. To bridge the compatibility gap, you can convert your contacts to a format supported by your new phone.
You can convert your CSV file into vCard format through your Windows computer.
- Go to the Contacts folder (C:\Users\<User Name>\Contacts)
- Click on Import and select the format as CSV.
- Next, click on Import and choose the CSV file you downloaded from Outlook.com.
- Click Next and wait for Windows to complete the import.
- Now click on the Export option inside Contacts and choose the format as vCard.
- Save the vCard file to your computer.
In the same way, you can also convert a vCard contact file into CSV by the above process. Alternatively, you can also convert a vCard file to CSV via an online converter such as Online vCard Converter.
- Click the Choose File button and upload your exported vCard file (max 8 MB supported).
- Choose the format as CSV (or GMail CSV) if you want to import your contacts to Google.
- Set additional parameters to filter or modify your contacts.
- Click on Convert. The converted file is automatically downloaded to your computer.
Syncing Contacts from the Cloud
Popular online services like Google, Yahoo, Facebook, Outlook.com keep records of your contacts. If you want to import these contacts on to your new phone, simply link your respective accounts on your phone. Your contacts should automatically get synced to your phone’s address book. Contacts syncing from social networks and email accounts is supported on all the above three Smartphone platforms.
On iPhone, you can import contacts from various cloud services. Go to Settings >> Mail, Contacts, Calendars >> Add account. Choose your preferred service (or set up an account manually) and sign in with your credentials. After the account is added, you can choose what to sync (Mails, Calendars, Contacts, and Notes). Similarly, contacts can also be synced from your Facebook and and other social networks by signing in to the official iPhone apps and going to Settings >> App Specific Settings (ex. Facebook) and select Update All Contacts.
On Android, you can import contacts to your phone by adding email accounts manually. To add an email account, simply go to Settings >> Accounts and Sync and click on Add Account. Contacts can also be imported from social networks by signing in to the respective official Android Apps. Make sure Account Sync is turned on for all your preferred accounts.
To import contacts into your Windows Phone, go to Settings >> Email Accounts >> Add an Account and choose the type of account you want to import contacts from. Log in to the respective account with your credentials and select preferences wherever available. For example, if you add a Microsoft or a Google Account, you can choose what you want to sync (Mails, Contacts or Calendar) and the data refresh duration. Wait for your phone to sync with the online service. Once syncing is complete, the account will be marked as Up to date.
This article should help you to transfer contacts between two phones irrespective of the OS it is running (provided they are either iOS, Android or Windows). If you know any better ways to cross-transfer contacts among different smartphones, feel free to share with us via comments.