Sometimes, you might want to create a PDF from a few selected photos in your iPhone Photos app. And, though you might find many solutions for converting your photos to PDF on the Internet, they mostly involve multiple dependencies, like downloading an image to PDF converter app from the App Store, or exporting the photos to a computer and using a desktop or web-based PDF creator/editor app. Some of these tools might also contain some limitations in the free version, such as requiring a paid license to save the PDF without a watermark.
However, very few might know that iOS has a native hidden feature to convert images to PDF directly from the Photos app. In this article, we’ll explore how to do so.
How to create PDF from your Photos on iPhone
Most of us are probably familiar with a popular method of saving any web content as PDF, by using the Print option integrated with the web browser and then select “Save as PDF” or a similar option from the Print menu.
PDF is usually the most preferred format for printing or sharing purposes, as it encapsulates all the document dependencies (font, color palettes, etc.) along with the document contents in a small package. Thus, it preserves the look & feel of the document, regardless of the device or application used to render it.
Consequently, if a printing software allows you to save a document before printing, it would most likely provide it in PDF format, regardless of the original file’s format. Thus, if you wish to print it later using a different device, it would be rendered exactly the way it looks in the preview now.
Similarly, the print option on iOS is capable of saving prints as PDF through a somewhat hidden menu.
Make PDF from images on iPhone
Here’s how you can create a PDF from one or more images in the iPhone Photos app.
Note: Though this is written primarily for the iPhone, the trick works on any iPhone or iPad with the latest version of iOS or iPadOS.
- Open the Photos app on your iPhone.
- Open the photo that you want to convert to PDF, or enable the Select option for multiple selections.
- With all the selections done, tap on the Share button from the bottom-left corner.
- Scroll down and select Print. Don’t worry, we’re not going to actually print the photos. It’s just an intermediate step to help us create the PDF.
- Under the “Printer Options” menu, you will be able to see the images you selected in the order you selected them. Tap and hold on one of the images until it pops out, and then tap the same (popped-out) image again. A preview of the photo(s) should now open.
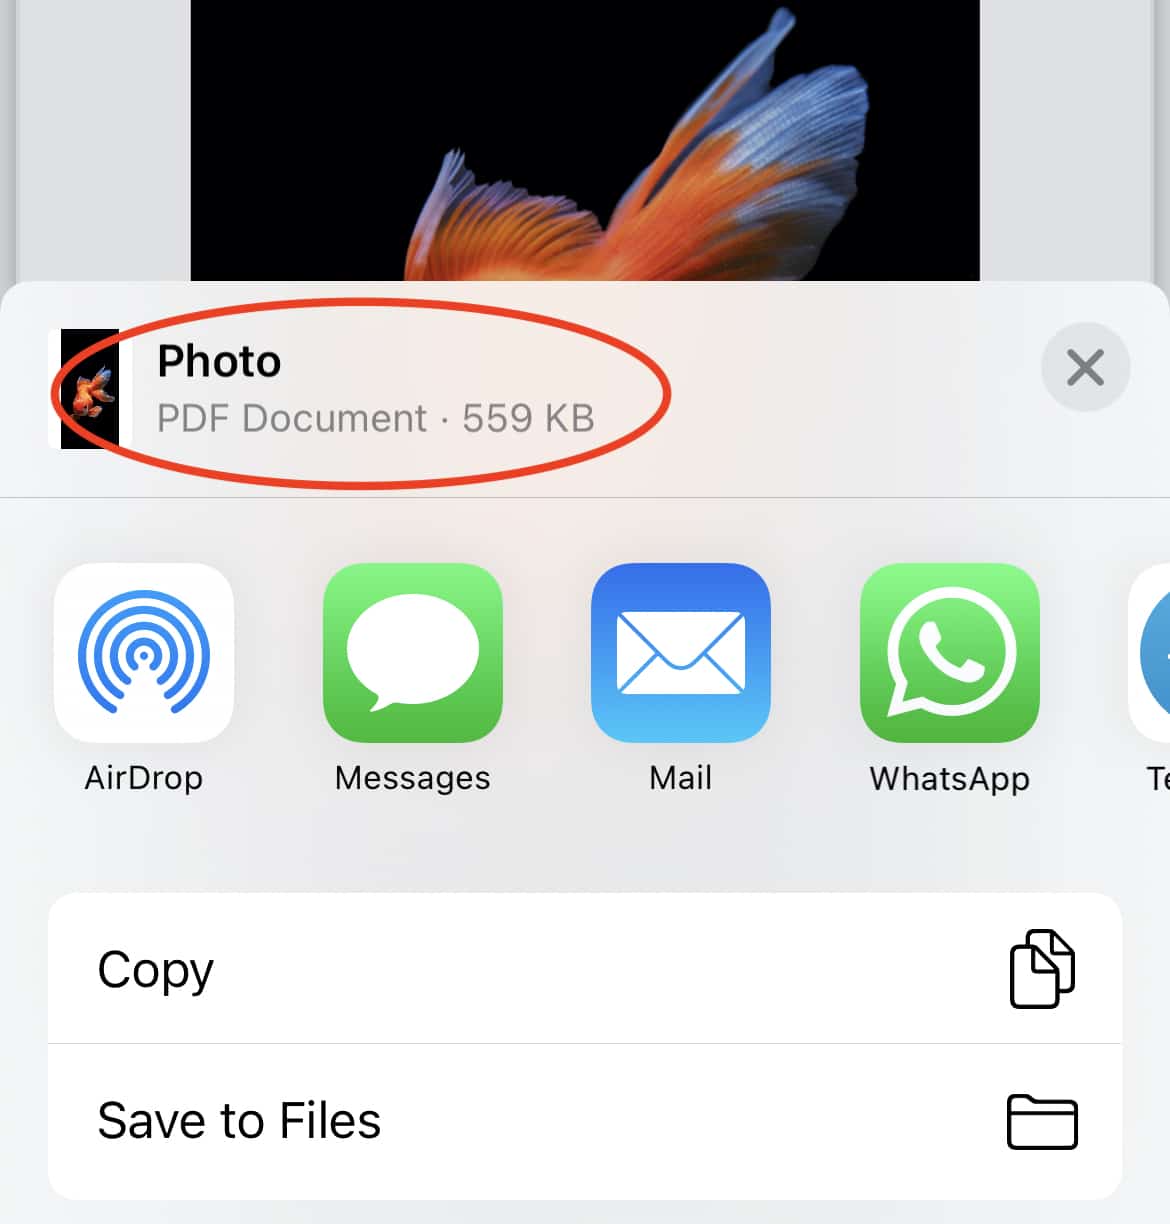
- Tap the Share button again in the top-right corner and select the “Save to Files” option to export the photo(s) as a single PDF.
The PDF file will be named as “Photo” by default, but you can rename it once the file is saved. You may also copy the file to third-party apps like Documents, from the Share Menu.
Note: This method preserves the full quality of your images inside the PDF document. Thus, if you’ve selected a large number of images, the document size could likely be huge. You can compress your PDF using a PDF compression tool like Smallpdf to reduce its size.
This is how you can create a PDF from your photos natively in iOS (or iPadOS).