If you are a regular internet user mostly accessing the web from home, you must be having a significant number of passwords saved on your browser for quick access to your online accounts. By saving your passwords, the browser automatically fills in the password field during the login process. Usually, you can save multiple passwords on your browser, each corresponding to a specific website. These passwords are locally stored in your computer and can be accessed from within the web browser.

But what if someone gains access to your computer in your absence? The person can easily open the web browser and steal all your account passwords. It’s only wise to take the precautions necessary to defend against such snooping attacks. There are several ways to protect the saved passwords from being seen by intruders, or even prevent browser access altogether. Let’s explore our available options in this matter with regard to two popular web browsers out there.
Google Chrome
Passwords saved using Google Chrome are accessible from the Google Chrome Settings Menu. To view the saved passwords, one simply has to navigate to Menu >> Settings >> Show Advanced Settings >> Manage saved passwords (under Passwords and forms).
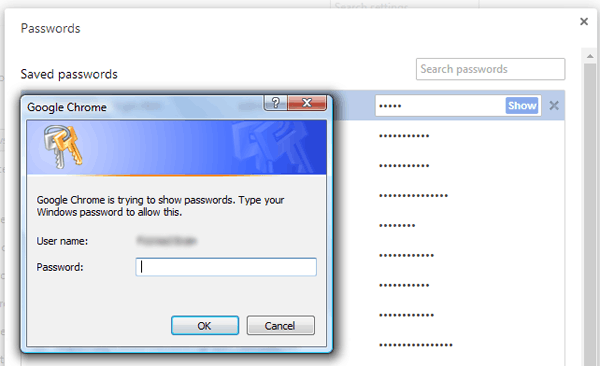
A pop up appears showing a list of websites along with the corresponding saved passwords (in hidden mode). Clicking on a particular website in this list reveals a Show button next to the corresponding masked password, which in turn reveals the password value in plain text.
Master Password for Google Chrome

Google initially did not include an option to set a Master Password (for protecting saved passwords) in Chrome. But the latest version of Chrome includes a new flag property to toggle Password Manager Reauthentication. This flag is available for both Windows and Mac versions of Google Chrome, but can be only toggled in the Mac version for now.
Password Manager Reauthentication

What the feature basically does is that it invokes the Credentials Manager on your system whenever the Show button is clicked. The user then needs to enter the system password in order to view the saved passwords. If you’re a Mac user, you might already have the Password Manager Reauthentication flag enabled in Chrome. However, if the feature isn’t working for you, you can manually set it too.
- First, check whether you have the latest version of Google Chrome installed on your Mac. Update it if you don’t.
- Go to Menu >> Settings >> Show Advanced Settings >> Manage saved passwords, and check whether clicking on Show button requires any authentication or not. If it does, the flag is already enabled for you.
- If ‘Show’ button immediately reveals your saved passwords, you have to manually enable the reauthentication feature.
- Type chrome://flags on the browser’s address bar to navigate to the Flags page.
- Find out the Password Manager Reauthentication flag and set it to enable.
- Restart the browser to save your changes.
Alternatively, if you are a Windows user, you may have to wait some time before the feature arrives on the official Google Chrome for Windows. The flag property is already present in the current version but remains a Mac-only feature as of now.
However, if you want to try out Password Manager Reauthentication right now, you may go ahead and install the latest version of Google Chrome Canary on your computer. Chrome Canary is a pre-release version of the original Google Chrome meant for developers and early adopters and might have stability issues. This feature is already enabled by default in Canary. If it’s not enabled, you can follow the steps given below:

- Type chrome://flags on the browser’s address bar to navigate to the Flags page.
- Find out the Disable Password Manager Reauthentication flag and set it to disable.
- Restart the browser to save your changes.
For this method to work, the user should already have set a system password. For more information on setting a Windows password, see here. The password will be visible only after the user has been authenticated.
Update: The “Disable Password Manager Reauthentication” flag is now available in the general release of Google Chrome for Windows. To use this feature, make sure you’re running the latest version of Chrome.
Lock Google Chrome with Password
Sometimes, you might want to lock Google Chrome with a password to prevent its unauthorized use while you are not around. The new version of Chrome now includes a new flag that lets you to lock down a browser profile with your synced Google account password. It’s a really handy feature to restrict users from accessing your user profile, which may contain bookmarks, extensions, saved passwords, active sessions and a lot of other personal data.
To use this new password feature, you need to follow the steps mentioned below:
- Type chrome://flags on the browser’s address bar to navigate to the Flags page.
- Look for the flag called Enable new profile management system and set it to enable.
- Click on the Relaunch Now button to restart Chrome and save your changes.
Once Chrome restarts, you’ll find a new label on the top right corner with the current user profile name. Click on the label to reveal additional options. To lock Chrome for the current profile, just click on the Lock icon within the pop up.
From now on, every time Chrome is launched, Chrome will ask for the Google account password linked to the particular user profile every time it is launched, until the profile is unlocked. However, users do have an option to browse as Guest, but that will just open a new user profile with all the default preferences.
Using Chrome extension
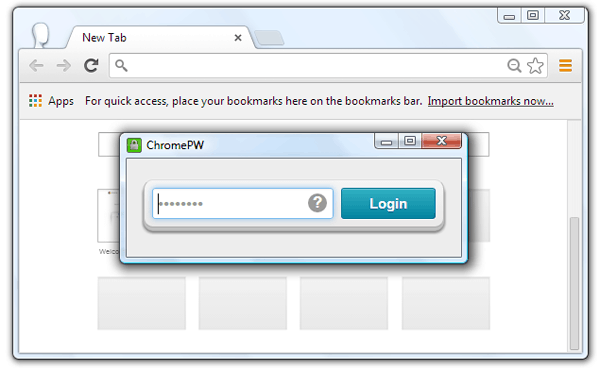
One aspect of this profile management system is that users need to manually lock their profile. If you want to lock Chrome automatically at the end of each browsing session, an extension called ChromePW is more convenient. ChromePW requires you to enter a password in the beginning of every browsing session. This password can be set from the extension’s options page. Follow the steps below to setup and use ChromePW for Google Chrome.
- Download and install ChromePW extension.
- After installation is complete, it should automatically open the configuration page. If it doesn’t, you can manually go to Menu >> Tools >> Extensions >> ChromePW Options.
- Here, you may set the password for ChromePW, and toggle other features like Auto Lock, Minimize, a Security Mode (which prevents it from being terminated by task managers) and set the limited number of login attempts. After this limit exceeds, Google Chrome will automatically close.
Using ChromePW will prevent unauthorized use of Google Chrome, as unless the correct password is entered on the start of every new session, the browser remains unusable. If the user tries to close the password prompt or open any other tab or window, Chrome will shut down automatically.
With ChromePW, you can also lock an active browsing session for temporary purposes. Just right click on the current webpage inside Chrome and select ChromePW. Chrome PW immediately locks down the browser and asks for the password.
Mozilla Firefox
Ideally, saved passwords on Firefox are accessible from Firefox Options under Security tab. You can click on the Saved Passwords button to open the list of sites with their passwords saved in Firefox. Clicking on Show Passwords reveals the previously hidden password field.
Firefox Master Password

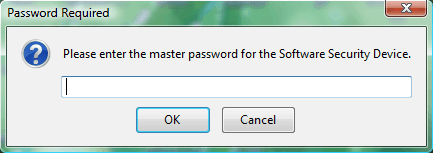
Mozilla Firefox already has a built-in Master Password feature. This password acts as the key to unlocking all passwords saved in Firefox and prevents unauthorized access to your saved passwords. When the Master Password is set up, Firefox will first ask for a password every time the Show Passwords button is clicked. The Master Password feature may be accessed from the Firefox Options menu.
- Go to Firefox Options >> Security tab and check on Use a master password checkbox.
- The Change Master Password will be enabled now. Click on it and set your new password.
Lock Firefox with Password
Usually, Master Password can only prevent users from viewing saved passwords on Firefox. But Master Password+ is a Firefox plugin that extends the functionality of Master Password. You can configure Master Password+ to make Firefox ask for the master password at startup. Firefox will then ask the user for the master password every time a new session is opened. The browser window opens only after authentication is successful.

- To set up Master Password+ in Firefox, first download and install the plugin in Firefox.
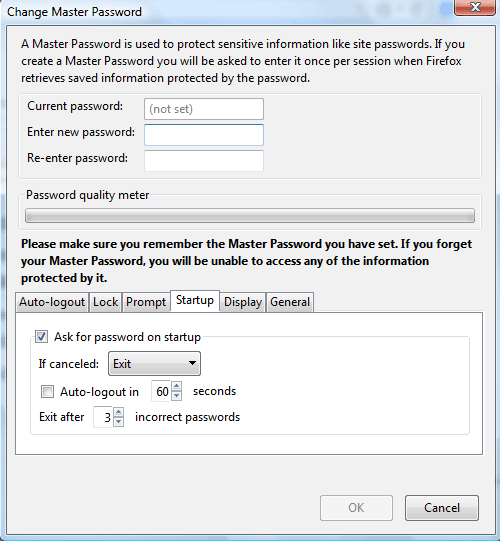
- Go to Firefox Options >> Security tab and click on Change Master Password.
- The Master Password window now shows additional options at the bottom.
- Here, click on the Startup tab and check on Ask for password on startup.
- Remove the check on “Auto-logout in _ seconds” option.
- Firefox will now prompt for the master password when launched.
Web browsers store sensitive information in the form of account passwords, browsing history and other details. The features mentioned above will help you to keep it secured from potential intruders. Are you guys familiar with any other browser extensions and features that offer unique and preferably better security? If so, put your thoughts in the comments below.