The need for editing professional videos is more prominent now than ever, as being a YouTube creator became the next big thing. Not only YouTube, people these days want to put out different content across all of the social media.
But, despite the various set of tools available to generate more content online, creators still need to spend a lot of time and effort. And, when it comes to video editing, there’s a learning curve involved as well.
And sure, software programs like Adobe Premiere Pro and Final Cut Pro often make the headlines for their powerful and precise video editing toolsets. But when you’re just starting, these products might be too pricey for you.
Are there any video editing programs that you can get for less, and yet provide you with the right set of tools to help you create and edit pro-level videos?
Filmora9 – Video editing for beginners and intermediate users
Wondershare is a software company that’s behind some of the most powerful smartphone and media tools available for consumers in the tech industry. And Filmora is no exception. Let’s take a deeper dive into the video editing software and find out what it has to offer.
You can download Filmora for free from the official Wondershare website. It is available in both Mac and Windows versions. The installation is simple enough. Just download the installer package, run it, and follow the on-screen instructions.
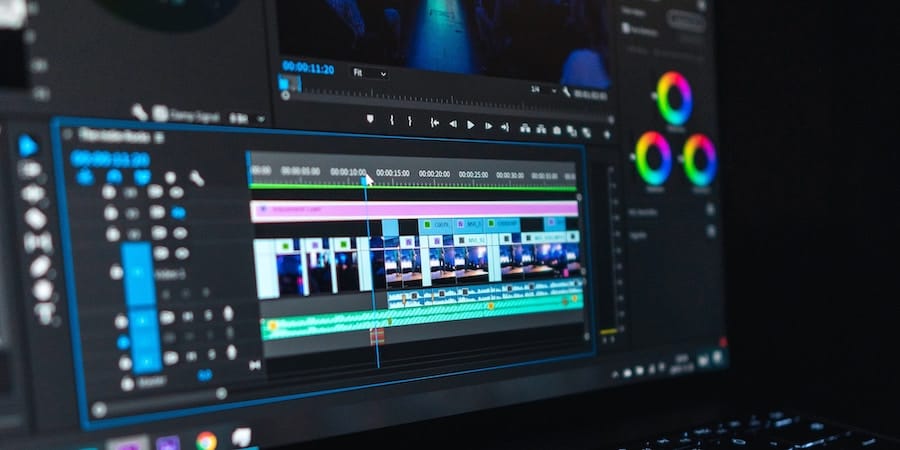
If you’re familiar with professional video editing software, the first thing you’ll notice about Filmora when you launch it is that it has a toned-down UI.
Media selection, effects, transitions, and other elements occupy the top-left section, while the Preview window appears on the right. The bottom half is dedicated to the Timeline, where you’ll mainly edit your movie. Here, you can edit, cut, trim or add effects to your video & audio clips after importing them.
Basic Editing with Filmora Video Editor
To add video and audio clips into your project, simply drag and drop them into the Project Media folder or click on the “+” button to browse for media. Filmora 9 supports the editing of 4K footage.
Once imported, you can use the controls in the Preview pane to watch your clips and select the start and end points of each clip by using the “Mark In – {” and “Mark Out – }” buttons to trim the clips as desired.
When you’re done, start adding your clips to the Timeline to add them to your movie. You can place all your media in a single layer, but if you want to add more elements, you might want to use multiple layers. Filmora lets you add up to 100 of these layers in a movie.
Note: If multiple clips overlap across two or more layers, only the content on the top layer will be viewable in your movie.
Adding Titles, Filters, Effects, Transitions, etc. in Filmora
Now, it’s time to add effects, transitions, and other artifacts to your movie. And Filmora does a pretty good job of making it quick and easy. The app has a vast library of built-in, predefined effects and transitions (called Filmstocks), with more available to download and purchase from their official website.
To add an effect, drag it from the Effects library on to the desired clip in the timeline. To add a transition, place it in between the two clips where you want the desired transition to occur.
Pro Tip: Add a Green Screen effect to your video using Filmora 9. If you have green screen footage, Filmora makes it easy to replace the screen with just about any background at the click of a button.
You can play around with different effects, transitions, and filters until you get the desired results.
Exporting a Movie with Filmora
When you’re happy with the results of the movie, you can export it in the desired format (with choice of aspect ratio, resolution, and frame rate). Filmora lets you export movies to any folder on your computer, or post them directly to YouTube and Vimeo from within the app.
If you’re using the free version of the app, you’ll need to log into your Wondershare account to export the movie (offline exports are not supported in the free version). In this case, the exported movie would also contain a Filmora branded watermark.
Advantages / Benefits of Filmora
- A beginner-friendly video editor for YouTube, Vimeo, etc.
- Easy to learn UI and workflows
- Media imports are quick
- Supports full, 4K exports, even in the free version
- A large collection of free built-in preset motions, transitions, sound & video effects, with more available to download
- Audio keyframing in Timeline to have better controls
The full version is available at an affordable price
Limitations / Shortcomings of Filmora
- The free version requires you to be online while exporting videos
- Only one export supported at a time
- Filmora allows a maximum of 100 layers to be added to the timeline.
- Lack of an option to toggle the visibility of layers on the timeline
Wondershare Filmora can be a great tool to increase your productivity when you’re just beginning your YouTube career. But what if you’re experienced in video editing, want advanced controls, and yet keep workflows simple at an affordable budget?
FilmoraPro – Video Editing made easy for professionals
Wondershare FilmoraPro ticks most (if not all) of the above boxes. It’s an affordable video editor that’s just got the right set of tools that professionals use more frequently in their workflows. And with a decent number of keyboard shortcuts, presets, etc., FilmoraPro can help get your work done quicker than many other editing programs.
FilmoraPro is available as a free download, while the full version can be purchased from the Wondershare website. Like it’s smaller cousin, FilmoraPro is supported on both Mac and Windows platforms.
Basic Editing on the FilmoraPro Video Editor
When you launch the app, you’ll get a screen similar to Filmora’s launch screen. Clicking on “Create New Project” takes you right into the program’s interface. If you’ve worked on any professional video editor, like Adobe Premiere Pro or Apple’s Final Cut Pro software, the interface might seem oddly familiar.
One of the good things that FilmoraPro has to offer is dynamic workspaces, which lets you change the layout of the various UI elements depending on the work you’re doing. You can even drag and snap UI elements manually the way you prefer.
The basic layout has the media library panel located at the bottom-left, the timeline in the bottom-right along with Meters, the Viewer (Preview) window up on top-left, a trimmer tool that lets you cut individual clips before you add them to the timeline, while the timeline-specific tools occupy the top-left.
The media manager lets you import all your editing artifacts in one place before you start working on the project. Unlike the basic edition of Filmora, importing clips to your project could take some time depending on your processing power, how large the imports are, and so on.
When the import is completed, you can start adding your clips into the timeline. Here, FilmoraPro brings several improvements over its smaller cousin.
Advanced Editing on FilmoraPro
You can add an unlimited number of layers to the timeline. And even though you still have access to Filmora’s Preset packs, FilmoraPro now lets you add your own animations and effects. Then, there’s also a long list of shortcuts that will help speed up your workflow. You can take a look at the shortcuts list by going over to FilmoraPro’s Preferences.
At any point in the timeline, you can add custom animation elements, and use keyframing, effects and masks to transition your scenes effectively. And even if you have multiple elements overlapping in the time, you can turn the visibility of different layers to help you iron out specific parts of your movie.
FilmoraPro also has advanced color correction tools to provide those necessary finishing touches. The control panel on the top-left houses histograms, scopes, and layout tools, which you can use to fine-tune different elements of the movie.
All that said, bear in mind that if you’re already familiar with pro-level tools like Premiere Pro or Final Cut Pro, FilmoraPro might not give you the same level of precision. Sometimes, trimming isn’t on point and you may need to export a movie multiple times to get it right.
But then again, you’re getting a decent pro software for a fraction of the price you’d usually pay. So, if you can’t afford to pay for PP or FCP, you’ve nothing to complain about.
Exporting a movie in FilmoraPro
To export a movie, click on the Export button on the top-right corner of the Timeline panel. Like the basic Filmora edition, FilmoraPro Free also requires you to be online and log into your Wondershare account for exporting a movie. There’s also a similar watermark embedded in the movie when you’re using the free version.
Exporting is far more streamlined on FilmoraPro compared to Filmora. The new version introduces multi-tasking into the mix. You can export multiple movies simultaneously, or keep working on an edit while another movie gets exported.
Advantages / Benefits of FilmoraPro
- Easy-to-use drag and drop interface with flexible workspaces
- Unlimited layers allowed in the timeline
- Advanced video editing tools at a fraction of the price
- A fully functioning free trial with some feature limitations
Limitations of FilmoraPro
- Sometimes, the accuracy of the trimming tool isn’t on point
- Keyboard shortcuts, though useful, are fairly limited
- The ability to add custom shortcuts is missing too
- No availability of codec selection for rendering purposes
- Like the basic edition, exports are not allowed in the free version without logging into a Wondershare account, thus limiting the tool’s offline functionality
Wondershare Filmora v/s FilmoraPro – Pricing
Now that we’ve discussed at length about the features of the two editing tools, now let’s talk about the cost.
Filmora (the basic edition) is available at a subscription price of $7.99 per month or $44.99 per year. But, there’s also a one-time Lifetime Plan available for $59.99, which is a way better deal, if you’re able to fish out the extra fifteen bucks.
Meanwhile, FilmoraPro has an Annual Plan of $89.99 per month and a Lifetime Plan of $149.99 per month. Just in case you were wondering, the annual price of Adobe Premiere Pro would be around $240.
All of these plans will unlock all the features of the respective Filmora edition, and remove watermarks from the videos. You’ll also get free tech support and free updates while your plan is active.
Conclusion – Which video editing software should you go for
In short, both Filmora and FilmoraPro are great video editing solutions for Mac and PC. The basic edition, Wondershare Filmora, is the perfect tool for new YouTube creators who want to put out videos, and are on a limited budget.
The tool also is capable of speeding up your workflow, with preset packs already available for download or purchase.
Learning is easy, and most newcomers would be able to create pro-looking videos with the basic edition itself.
FilmoraPro, on the other hand, appeals to intermediate and expert users. You can always take advantage of the built-in presets, but FilmoraPro gives you the option to customize, and take it further with advanced capabilities. All this, at an amazing price too!
Now, if you’re already using advanced tools like Adobe’s suite for video editing, switching is not recommended. You’re likely going to miss several features, and the level of precision might not meet your expectations.
But if you’re on a limited budget and have always wanted to try out a pro-level video editor, you might want to give Wondershare FilmoraPro a try.