So, you’ve set up a new PC or reinstalled the OS on your computer after factory reset. Now comes the most painful part – downloading and installing all the important software and third-party apps.

It’s the last step that’s probably the most time-consuming when setting up a computer for the first time. Luckily, there is a workaround that can help you automate the process with minimal manual intervention.
In this article, we’ll explore how to install and update multiple essential apps and programs on your PC or Mac, all at once.
Install multiple apps at once on Windows
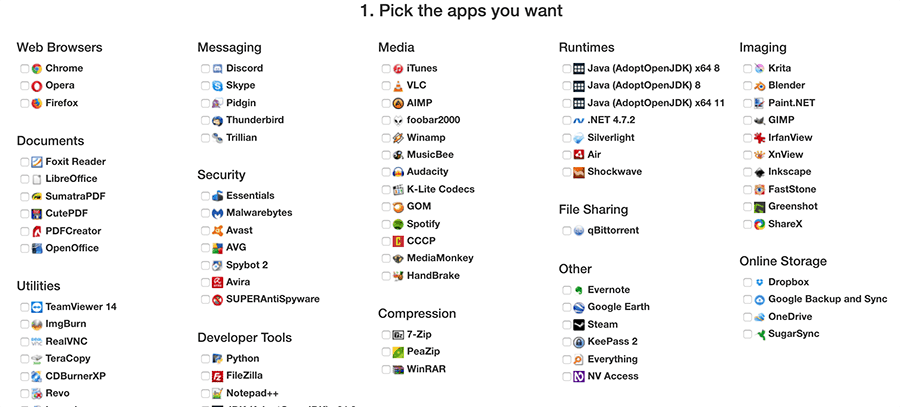
Ninite is a utility for Windows that allows you to download a custom offline installer package that contains all the software programs selected by you. Here is how you can use the utility to install multiple apps together on your Windows PC.
- Visit the official Ninite website on your favorite web browser.
- From the list of available programs, choose the ones that are most essential to you (or the ones that you want to install).
- Now, download your custom installer/updater package from the provided link.
- Copy the downloaded installer to the desired system in which you want to install the programs and run the installer.
All the selected software programs will be installed on the PC sequentially, even without an active Internet connection.
You can keep your own custom copy of Ninite installer and use it to install the selected apps on any PC. If your PC is connected to the Internet, the installer will also check for updated versions of available apps, and update the installer automatically.
Ninite has been around for a long time and now even has a Pro version of the app for business users, which lets IT professionals remotely deploy and update software in company workstations.
Install multiple apps at once on Mac – Ninite for Mac
Until recently, there weren’t any viable Ninite alternative for Mac available on the Internet. But that was until the macapps.link website came into existence.
This website follows a very similar approach to Ninite, in that it lets you create custom installer packages, by selecting the programs and apps that you want to install. But instead of letting you download an offline installer package, macapps creates a custom curl command that you can run in the Terminal to get all the selected apps automatically installed.
- Go to the macapps.link website and select the apps that you want to install on your Mac.
- When done with the selection, click on “Install n apps” button on the top of the screen (where n is the number of selected apps).
- The website will show you a custom curl command on the screen. Copy the command from your browser window.
- Now, open the Terminal by launching it from Spotlight Search or from the Utilities folder within the Applications directory.
- Paste the copied command and hit the Return key.
That’s it! Now you can sit back and wait as all the selected apps are installed via the terminal.
Note: Since the Terminal actively downloads the software packages from the Internet while running the command, an active Internet connection is required for this to work.
Also, some of the apps offered by macapps repository are paid software programs. You’ll need a valid license key to run those programs, even though you’ve installed them from the macapps repository.
Did you learn something new from the article? Leave your thoughts in the comments below.