It’s that time of the year again; Apple has officially released macOS Sierra on the Mac App Store, and everybody just wants to upgrade their Macs to the latest release. And with that, many Mac users are likely to face issues while downloading the update via Mac App Store [MAS]. Due to its large size and slow download speed, the download usually takes longer time to complete. And during that, it might get interrupted, and then restart all over again.
>> Install macOS High Sierra on Mac [Direct Download] <<
UPDATE: macOS High Sierra has been released. Check out how to get macOS High Sierra from outside the Mac App Store.
This happens primarily because of the high volume of traffic hitting the Apple servers, which causes congestion in the network. And the situation would probably remain the same, at least for the first few days. I remember wasting around 15 GB of data trying to download OS X El Capitan last year.
That’s when we came up with a workaround to download OS X El Capitan via direct download instead of from the Mac App Store. Continuing the tradition this year too, we have created a separate page for maintaining all updates regarding macOS Sierra direct download.
Download and Install macOS Sierra without MAS
Ideally, when you download macOS Sierra from the Mac App Store, some raw package files will be downloaded to your computer. These packages are not directly installable on your Mac. Only when MAS processes these files during the download, are they converted to an installable (.app) file that can run on your Mac.
In this workaround, we’ll directly download the raw packages from Apple servers using the web browser or a dedicated download manager. Once the files are downloaded to the computer, we’ll configure our system in such a way that Mac App Store fetches the raw packages directly from the local repository (localhost) instead of from the Apple servers.
Note: If you use a Download Manager like Folx to download the raw packages, you’ll also be able to achieve higher download speeds compared to what you’d get if you’d downloaded the update from MAS.
macOS Sierra [Direct Download]
If you’re already familiar with downloading El Capitan from outside of MAS, this method also follows similar steps. Only, instead of one package, there are two this time. If you’re new here, just follow the steps mentioned in this section to download macOS Sierra directly without the Mac App Store.
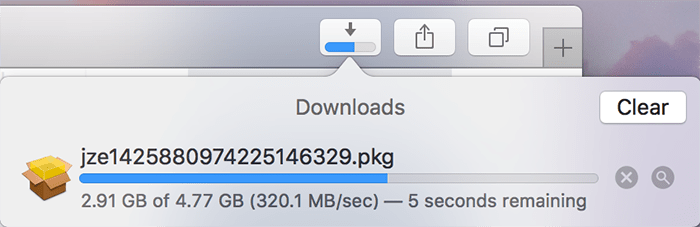
Step 1: Download the macOS Sierra package files from their respective URLs. When you have downloaded them, you’ll have two packages. One is the .pkg file that contains the actual OS. The second is a signed .pfpkg file, which tells Mac App Store where to look for the .pkg file.
macOS Sierra 10.12 (16A323) / September 20, 2016
- macOS Sierra .pfpkg file download URL: http://osxapps.itunes.apple.com/apple-assets-us-std-000001/Purple62/v4/a3/a3/14/a3a31405-6063-cb0e-5af4-fdeb8fc39491/signed.dcr.6908747036561828369.pfpkg
- macOS Sierra .pkg file download URL: http://osxapps.itunes.apple.com/apple-assets-us-std-000001/Purple62/v4/af/5f/9d/af5f9d8e-cf9c-8147-c51c-c3c1fececb99/jze1425880974225146329.pkg
#Update: Here, we have mentioned the URL of the package file for macOS 10.12. If the latest version of macOS Sierra available on the Mac App Store is a different one, MAS will fetch it from a different location. Hence the workaround mentioned here will not work, unless you know the URL of the latest package file and create the directory structure on localhost based on the same.
Before downloading the package, ensure that it is the latest version of macOS Sierra released on the MAS. You may find out the URL of the latest macOS Sierra package files from the comments below or by searching on the Internet for it.
Step 2: Configure the Mac so that MAS looks for the macOS packages within your computer instead of fetching them from Apple Server.
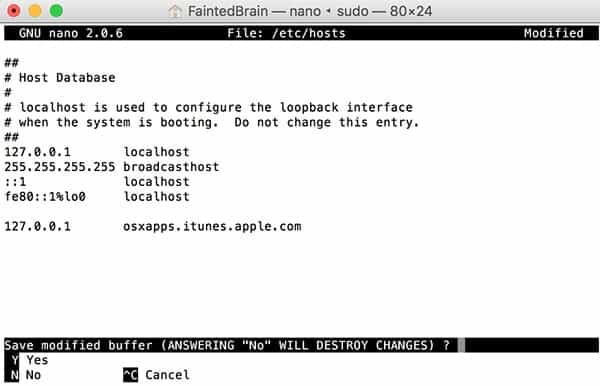
For this, you need to edit your OS X hosts file and point the root domain of the download URLs (for example, “osxapps.itunes.apple.com”) to localhost (127.0.0,1), Follow the steps below to modify the hosts file as required:
- Launch Terminal on your Mac from Launchpad or Applications list.
- Type in the following command: “sudo nano /etc/hosts”
- Provide the System Password (if required). The hosts file is now open in editable mode within the Terminal window.
- Append the following line to the end of the file: “127.0.0.1 osxapps.itunes.apple.com”.
- Press control + X (^X), then Y and hit return to save the file and return to Terminal prompt.
Now, whenever any request is generated from your computer to the root domain (osxapps.itunes.apple.com), it will point to your localhost.
Note: Sometimes, you might need to flush the DNS cache for the changes to take effect. To flush DNS cache, type “sudo killall -HUP mDNSResponder” in the command line and hit return.
Step 3: Place the downloaded packages (.pkg and .pfpkg files) in a certain relative path (directory structure) on your Mac, as indicated by the structure of their respective download URLs. In this example, we will create a folder named “macos_local” on Desktop, and replicate the directory structure of the two package URLs under the same. Once the relative path has been created, we’ll configure the localhost server to point to the macos_local directory on Desktop and run it. Follow the steps below to achieve the same.
Note: OS X comes preinstalled with Python, which natively includes a SimpleHTTPServer by default. This server can turn any directory on your Mac into a web server directory.
- Open Terminal from the Launchpad or Applications list.
- Type “cd Desktop” on the command line and hit return to enter the Desktop folder.
- Type “mkdir macos_local” and hit return to create the root directory of the same name on Desktop.
- Go to the newly created folder by typing “cd macos_local” and hitting return.
- Enter the following commands to create the relative paths for the .pfpkg and .pkg files respectively, inside the macos_local folder:
“sudo mkdir -p ./apple-assets-us-std-000001/Purple62/v4/a3/a3/14/a3a31405-6063-cb0e-5af4-fdeb8fc39491/”
and
“sudo mkdir -p ./apple-assets-us-std-000001/Purple62/v4/af/5f/9d/af5f9d8e-cf9c-8147-c51c-c3c1fececb99/”
Provide the admin password when requested. - Place the downloaded package files in their respective relative locations (as per their URLs) within the macos_local folder on the Desktop. Click on Authenticate when prompted, and provide the system admin password.
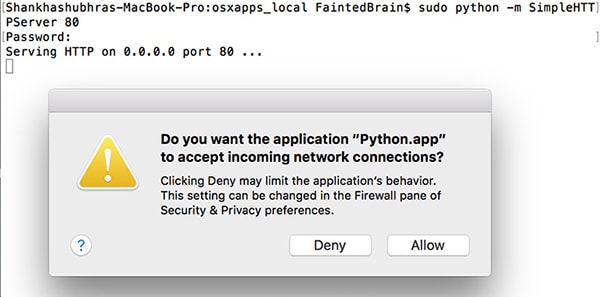
- With macos_local as the present working directory in Terminal, execute the following command: “sudo python -m SimpleHTTPServer 80”. Provide the admin password and click on Allow in the subsequent message prompt.
The current directory (macos_local) will now be hosted on localhost. Leave the Terminal window open to keep the localhost server running until all the steps have been completed.
To verify the setup, open any of the package URLs (.pkg or .pfpkg) in your browser and check the download speed as it downloads the package. You should notice a very high speed which is much higher than the speed of your Internet connection. This is because the file is being downloaded from localhost. Your Internet bandwidth is not being used.
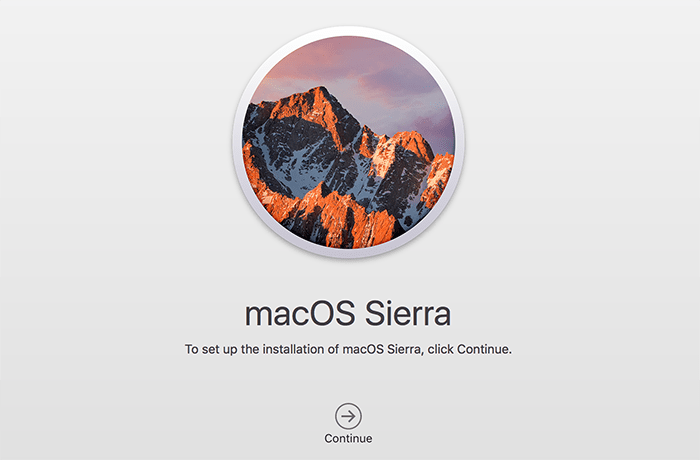
Step 4: Now launch the Mac App Store and install macOS Sierra in the usual way. This time, MAS will fetch the package files from localhost and launch the installer package once the packages have been processed.
Note: Your Mac might request resources from the “osxapps.itunes.apple.com” domain while installing macOS Sierra. Thus, it is recommended to remove the entry from the hosts file that we appended earlier, before proceeding with the installation.
Is this method genuine?
In this workaround, we are downloading the required resources from the Apple Server and using Mac App Store to install the OS update. So yes, it is as genuine as the official method. The only thing we are changing here is the location where MAS fetches the packages from. If you are downloading the packages from third party sources, you can verify whether it’s the original file by comparing their MD5 and SHA1 hash values.
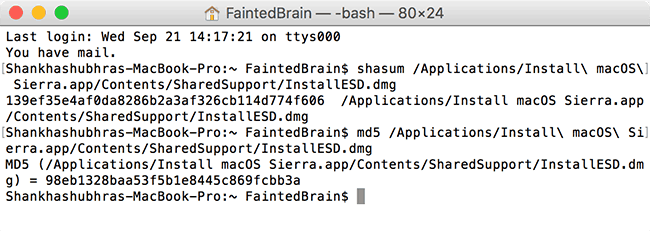
InstallESD.dmg
SHA1: 139ef35e4af0da8286b2a3af326cb114d774f606
MD5: 98eb1328baa53f5b1e8445c869fcbb3a
jze1425880974225146329.pkg
SHA1: ec52c6c84e1c05b1a756255452920139b23269f6
MD5: 4c9c441227f888e5c35e786f8203bf32
macOS Sierra Bootable Installer (macOS Sierra DMG)
You can now update to macOS Sierra on multiple Macs using the macOS Sierra “.app” file. But if you’re looking for a fresh installation, you need to create a bootable installer for Sierra.
One way to do so is from the Sierra DMG (InstallESD.dmg) file, which you can get from the “.app” file by browsing the Package Contents in Install macOS Sierra.app/Contents/SharedSupport/ folder.
Alternatively, the bootable installer for macOS Sierra may be directly created from the “.app” file using the “createinstallmedia” command, as suggested by Apple.
If this workaround has helped you to get macOS Sierra easily or saved your Internet bandwidth on single or multiple installations, let us know in the comments below.