Sometimes, your PC might need to be sent for repair, or you might have mistakenly logged in to your personal Microsoft account on a PC or laptop issued by your organization or university.
In such cases, you might want to sign out and completely remove your personal Microsoft account from the PC.
Although you might expect this to be possible, the option may not be intuitively available on Windows 10 or Windows 11. In this article, we’ll explore various ways to remove a Microsoft account from a Windows 10/11 PC.
How to remove your Microsoft account from Windows 10/11
If you go to the “Accounts” section of your PC, you might notice that there’s no direct option to remove or unlink your Microsoft account. But there are a few workarounds available to deal with the issue.
Enable the Remove button for your Microsoft account
The following steps will guide you to enable the Remove button for your Microsoft account if it’s missing or unavailable.
- Click Start, then go to Settings >> Accounts.
- Under Your info tab, look for and click on Stop signing in to all Microsoft apps automatically. Once the process is completed, Your info should display Local account instead of your Microsoft account email.
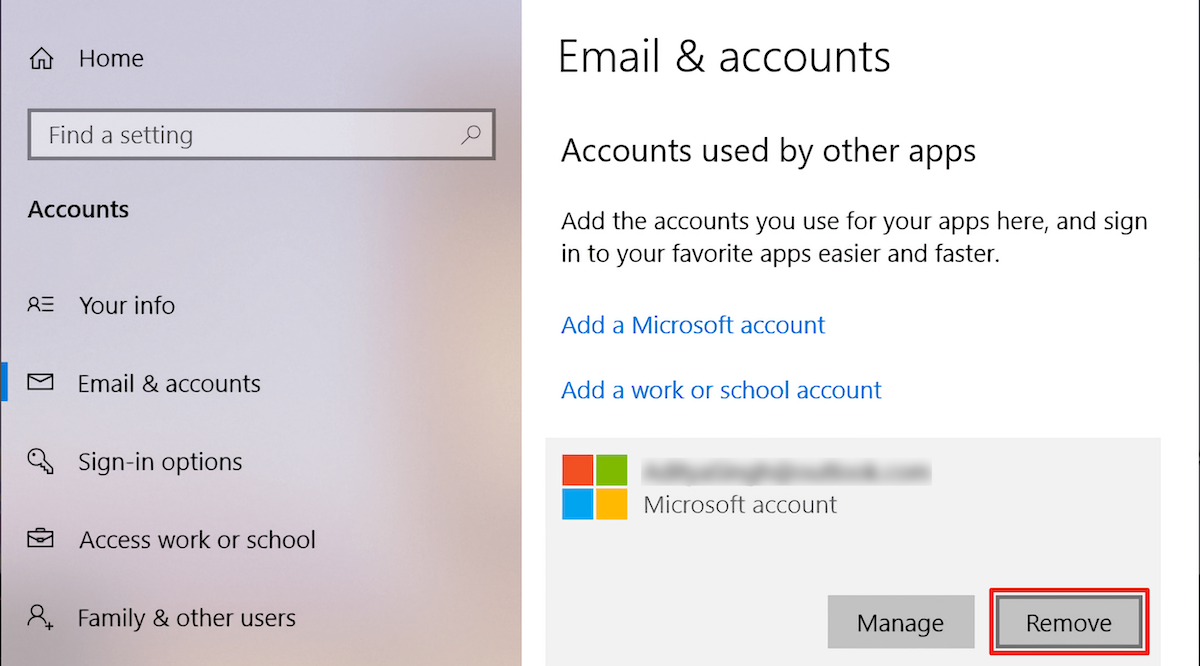
- Now go to the Email & accounts tab, and you should see the Remove button next to your Microsoft account.
- Click the Remove button and follow the on-screen instructions to unlink/delete your Microsoft account from the PC.
If you don’t see the Stop signing in to all Microsoft apps automatically link under Your info, or are unable to remove the Microsoft account, the below solution or fix would surely work for you.
Create a Temporary local account to remove the Microsoft account
To remove your Microsoft account from a Windows PC, you may need to create a local administrator account, sign out of your current Microsoft account and sign in using the local account to remove it.
To create a local account on your Windows 10/11 PC:
- Press the Win + R keys.
- Type “netplwiz”, and then click OK.
- Click Add.
- Click Sign in without a Microsoft account (not recommended).
- Click Local account, type a username, and a password (optional).
- Click Next, and then click Finish.
To remove the Microsoft account from your Windows 10/11 PC:
- Sign out of the Microsoft account you want to delete, sign in using the local account you just created
- Click Start, then go to Settings >> Accounts.
- Go to the Family & other users tab.
- Under “Other users”, click on your Microsoft account that you want to remove from the PC.
- Click the Remove button.
- On the confirmation dialog box, click Delete account and data.
The Microsoft account should now be removed from your PC.
How to remove a Microsoft account from Windows 10/11 without password
If you have an administrator account on a Windows PC, you can remove another Microsoft account (belonging to you or a different user) signed in to the same computer, even without knowing their password.
You can do this in multiple ways:
- From the Settings app
- From Control Panel
- Using “netplwiz” utility
The steps to remove a Microsoft account are the same (or similar) on both Windows 10 and Windows 11.
To remove a Microsoft account from the Settings app:
- Click Start, then go to Settings >> Accounts.
- Go to the Family & other users tab.
- Under “Other users”, click on the Microsoft account that you want to remove from your PC.
- Click the Remove button.
- On the confirmation dialog box, click Delete account and data.
If you want to remove a Microsoft account via the Control Panel:
- Press the Win + X keys, and select Control Panel from the menu.
- Click “View by:” from the top-right corner, and select Large icons.
- Select User Accounts from the Control Panel main menu.
- Click Manage another account.
- Select the Microsoft account or user that you want to remove.
- Click Delete the account from the available options, and follow the on-screen instructions.
And here’s how to remove a Microsoft account using the “netplwiz” command.
- Press the Win + R keys, type “netplwiz” in the Run box, and press OK or hit the Enter key. This opens the User Accounts window.
- Under the Users tab, choose the Microsoft account (one you’re not currently logged into).
- Click the Remove button.
- Click Yes on the confirmation prompt to delete the Microsoft account from the Windows PC.
Now you know how to remove a Microsoft account from Windows 10 or Windows 11.