Although macOS supports multitasking just like any other desktop operating system, handling two different apps simultaneously isn’t convenient, even with the most advanced UI elements. For instance, if you have two app windows open side-by-side, resizing, positioning, and switching focus between them can consume valuable minutes of your productive work.
Fortunately, macOS does have a native feature to snap two app windows side-by-side in split-screen view. While in split view, the two app windows remain in position while you can easily resize windows and work with them simultaneously without having to continuously switch focus.
In this article, we’ll explore how to split-screen on Mac to multitask between two apps side-by-side.
Create a Split View on Mac
There are primarily two ways to create a split-screen view on macOS.
Option 1: You can hover over (or click and hold) the green full-screen button from the top-left corner of an app’s window, and choose “Tile Window to Left of Screen” or “Tile Window to Right of Screen”.
The app will be snapped to the left or right half of the screen, based on your chosen position. The other half of the screen will show you other split-screen supported apps; you can choose any one of them to fit the split view. You can now work in Split Screen View.
Option 2: Another way to enter split-screen view is to click the full-screen button from the top-left corner of an app window to enter full-screen mode. Then, swipe up with 4 fingers to enter Mission Control, and drag one of the apps into the Full Screen app from the top to create the split view. Now just tap on the Split View screen from the top of the screen to start multitasking between the two apps.
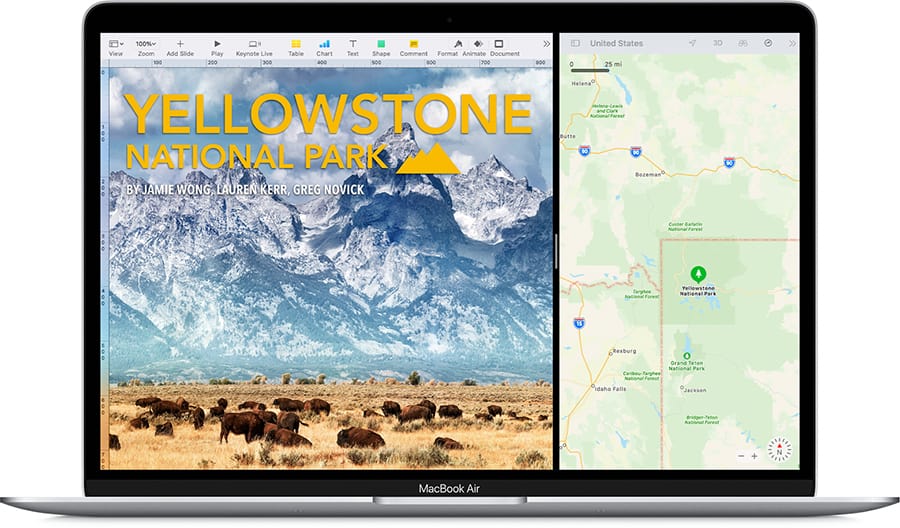
Use split view on Mac for multitasking
Once in Split Screen View, you can adjust the size of the left and right panes by simply dragging the separator left and right. You can swap the positions of the two split-screen apps by dragging one of the apps from the top to the opposite side. You can even drag and drop items such as media, text snippets, etc., from one side of the split-screen to another.
To change an app on one of the sides while in Split View, hover to the top of the screen to reveal the menu bar, then click and hold the Full-Screen button from the respective side of the split view. Select “Replace Tiled Window” and choose another app from the available options to substitute it.
Exit Split View on Mac
Finally, to exit the Split View, hover to the top of the screen to reveal the menu bar, then click and hold the Full-Screen button from the top-right corner of one of the split-screen panes. Now, choose either “Move Window to Desktop” or “Make Window Full Screen”.
Another way to exit split-screen is to swipe up with 4 fingers to enter Mission Control, then hover and click the Exit Full Screen icon from the top-left corner of the Split View workspace on top of the screen. The two apps will now be available on the current Desktop.
So, that’s how you can use split-screen on Mac. If you want to know how to use Split View on the iPad and iPhone, check our other dedicated article.