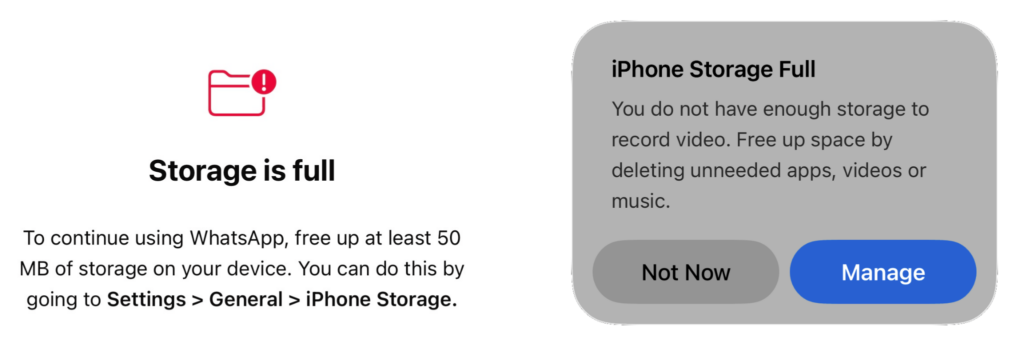
If you’re a long-term iPhone user, you’ve likely stared down the dreaded “iPhone Storage Full” notification. No matter how many photos you delete, it seems to return like a bad habit.
When your storage is maxed out, your iPhone doesn’t just stop taking photos; it starts to crawl. Apps won’t open, the interface lags, and the device can feel almost unusable. You might even be considering a higher storage capacity for your next purchase., thinking that’s the only solution.
But before you spend a thousand dollars on a new phone, let’s look at why this happens and how to clean up iPhone storage like a pro.
Why is my iPhone storage full?
Years ago, 32GB or 64GB was plenty. Today, most users struggle with 128GB or 256GB. Why?
- Growing App Sizes: Basic apps like Gmail now reach close to 700MB because of richer features.
- High-Res Media: Improvements in iPhone cameras (like 4K ProRes video) mean photos and videos are larger than ever.
- The System Data Trap: Caches and logs accumulate over time, often refusing to purge themselves.
Step 1: The Diagnosis
Before you start deleting, you need to find the “space hogs.”
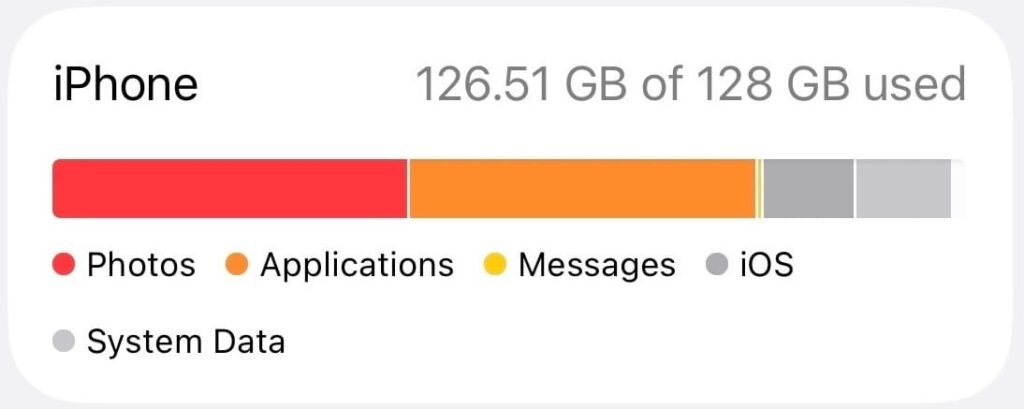
- Go to: Settings → General → iPhone Storage
Note:Wait a few seconds for the bar graph to fully load. This gives you a clear breakdown of Apps, Photos, iOS, and the mysterious System Data.
Step 2: Clear iPhone App Cache (Offload vs. Delete)
iOS doesn’t have a “Clear All Cache” button, so you have to be strategic. You have two main options in the Storage settings:
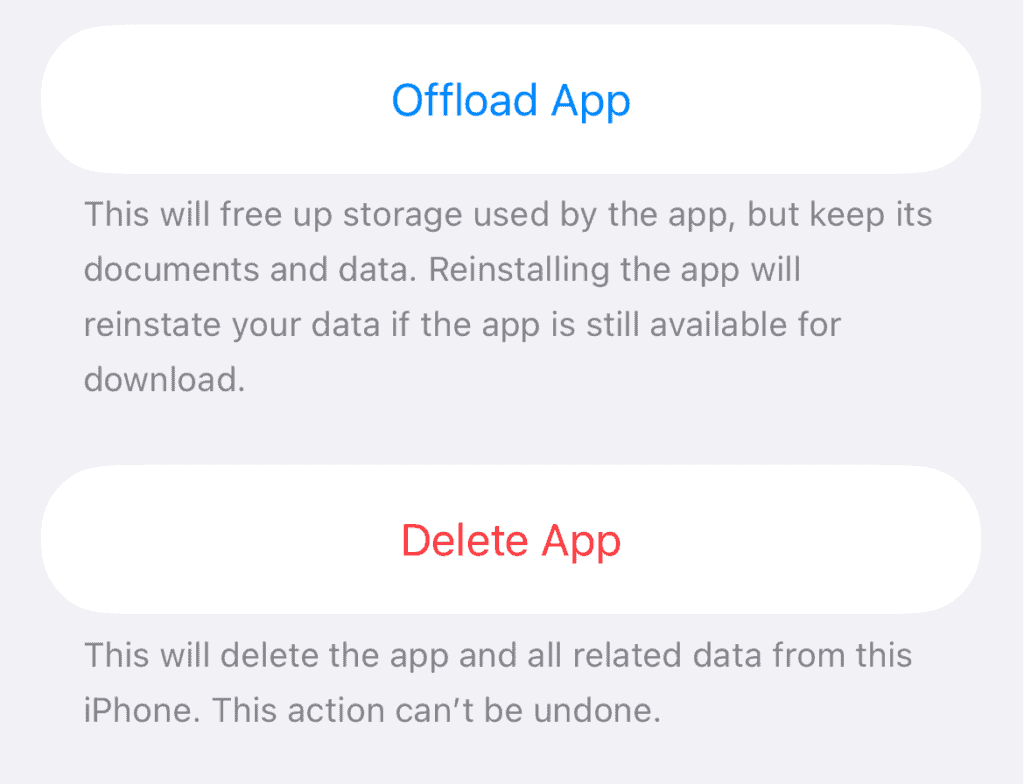
- Delete App: Deletes the app and all associated data including Cache.
- Offload App: For apps with local data you want to keep (like certain utility apps), use the Offload option in Storage settings. This deletes the app but keeps your files, so you can pick up where you left off later.
The “Social Media Flush”
Apps like Instagram, Facebook, YouTube, TikTok, etc. store massive amounts of “Documents & Data” (cache and more) over time.
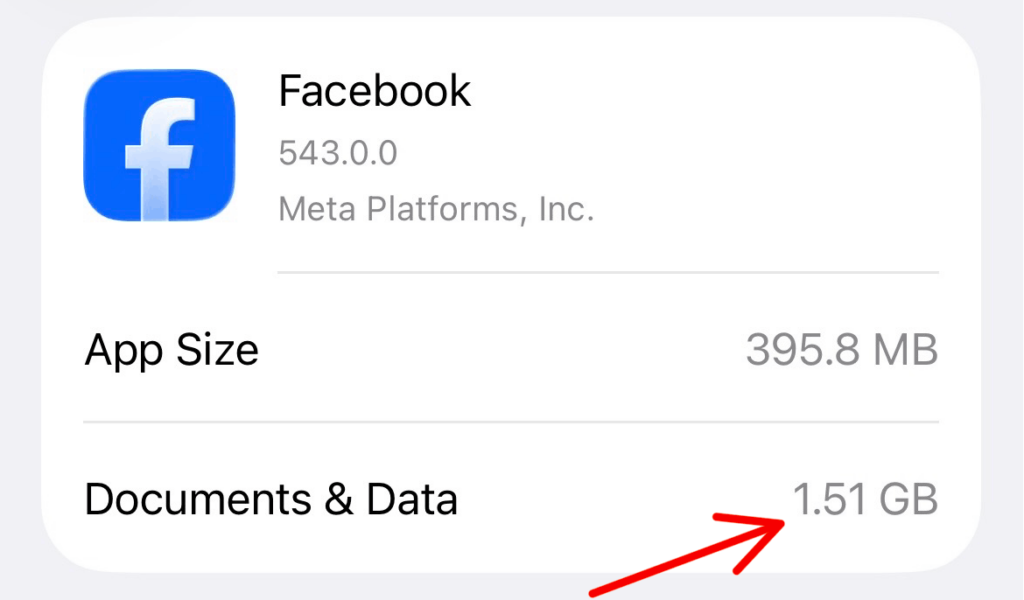
- The Fix: Delete the app entirely and reinstall it. Since your profile is in the cloud, you lose nothing, but you’ll instantly reclaim hundreds of MBs, or even GBs of space.
Note:Just make sure you have access to all the login credentials.
Tip:Don’t forget Safari! Go to Settings → Apps → Safari → Advanced → Website Data and select “Remove All Website Data” to clear hundreds of MBs of browser junk.
Step 3: The Silent Space Hogs – Messaging Apps
Messaging apps like WhatsApp, Telegram, and iMessage are often the primary reason for a full iPhone. They don’t just store text; they store every meme, video, and voice note you’ve ever received.
Manual Cleanup Within Apps
Instead of deleting the whole app, you can clean up iPhone storage by targeting large or unnecessary files within the app settings:
- For WhatsApp, Go to WhatsApp Settings → Storage and Data → Manage Storage.
- For iMessage (Messages), Go to Settings → General → iPhone Storage → Messages.
- For Telegram, Go to Telegram Settings → Data and Storage → Storage Usage. Tap Clear Entire Cache to remove downloaded media without losing your messages (they stay in the Telegram cloud).
Step 4: Delete or Clean Up System Data on iPhone
If you scroll to the bottom of the Storage page, you’ll see System Data. This should ideally be between 5GB–15GB. If it’s much higher, your iPhone isn’t purging temporary files efficiently.
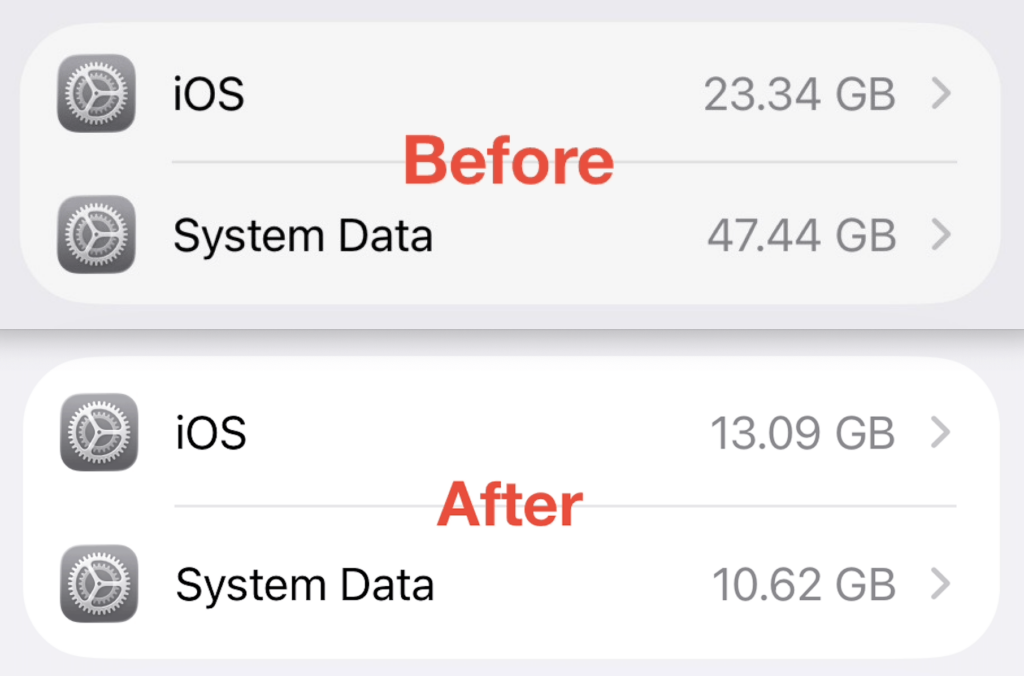
Since Apple doesn’t give us a “Clear” button for System Data, the most efficient way to clean up iPhone System Data is a refresh:
- Back up your iPhone (Preferably on a Mac or PC).
- Erase iPhone: Go to Settings → General → Transfer or Reset iPhone → Erase All Content and Settings.
- Restore from Backup: This process completely purges the junk system data and rebuilds your phone efficiently.
Clear iPhone System Data Without Reset (Hidden Trick)
If a full reset feels too drastic, there’s a lesser-known workaround that can force iOS to aggressively clean up temporary system files. While not officially documented by Apple, this method works by nudging iOS into re-evaluating cached data and expiring unnecessary files.
How to Trigger System Data Cleanup
- Go to: Settings → General → Date & Time
- Turn OFF “Set Automatically”
Step 1:
Change only the year to one year ahead (e.g., January, 2026 → January, 2027)
Wait for about 3 minutes
Step 2:
Now move the month forward by 3 months (e.g., January, 2027 → April, 2027)
Wait another 5 minutes
During this time, iOS may begin clearing outdated caches, logs, and temporary system files, freeing up noticeable storage space.
Step 3
Turn “Set Automatically” back ON
This will restore the correct date and time on your device
Important Notes ⚠️
Disable Low Power Mode:
Go to Settings → Battery and turn it OFF before starting.
Low Power Mode restricts background processes, which can prevent cleanup from triggering properly.
Fix “Set Automatically” Restrictions:
If you can’t disable it, go to:
Settings → Screen Time → Turn off “Share Across Devices”
Then try again.
Temporary Results Are Expected:
You may see a sharp drop in System Data immediately after this process.
Over time, some of that space will be used again as iOS rebuilds essential caches.
Understand What’s Normal:
Most iPhones stabilize around 10GB–18GB of System Data depending on usage.
If your storage quickly exceeds that again, it’s a sign that deeper cleanup (reset + restore) may be needed.
Best Use Case for This Trick:
This method is especially helpful when you need quick, temporary storage, such as:
- Installing an iOS update
- Recording high-resolution video
- Downloading large apps or files
It can push System Data unusually low for a short period, giving you breathing room when it matters most.
If your iPhone storage feels out of control, System Data is often the hidden culprit, and now you have both a fast workaround and a complete solution.
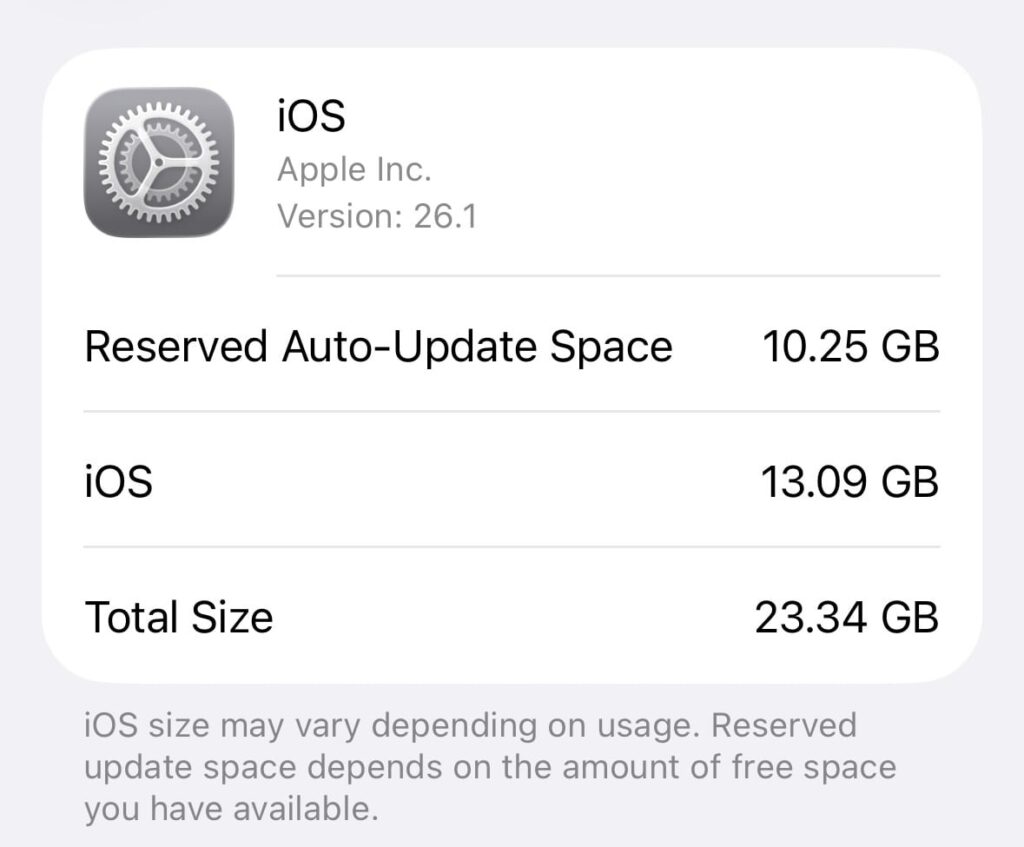
Step 5: Reclaim “Reserved Auto-Update Space”
In recent versions of iOS (including iOS 26), Apple introduced Reserved Auto-Update Space. This feature dynamically reserves 10-15GB of storage just to ensure updates can install successfully.
To get more iPhone storage instantly:
- Go to Settings → General → Software Update → Automatic Updates.
- Toggle OFF “Automatically Download” and “Automatically Install.”
- Restart your iPhone. This often “releases” that reserved space back to you.
Note:If an update is already downloaded, find it in the iPhone Storage list and delete the update file manually.
By following these steps, you can often reclaim 20GB to 50GB or more of space without deleting a single photo you actually care about.