Here’s a neat trick to get all your data uploaded to the cloud for free. Although, it does come with a few caveats.
When you see the words “cloud storage” or “online storage”, you probably think of the usual suspects like Google Drive, OneDrive, Dropbox, or even MEGA. But all these services provide a basic amount of free storage and then ask you to upgrade to a suitable paid plan to use more.
On the other hand, social media apps like YouTube, Facebook, Instagram, etc., technically allow you to upload unlimited photos and videos without any known storage cap. However, there might be a maximum limit to the size of individual images or videos you upload.
Of all these services, YouTube is one of the most reliable services that offer a much larger limit for individual files. If your account is phone verified, you can upload unlimited videos less than 12 hours long or 256 GB in size, whichever is smaller.
But as we all know, YouTube doesn’t allow you to upload any other file type, which is not a video or a photo (for thumbnails).
In this article, we’ll explore an option allowing you to encode any file as a video, so you can upload it to YouTube and use it as online storage. This will effectively allow you to store unlimited data on YouTube servers for free.
How to get unlimited free online storage
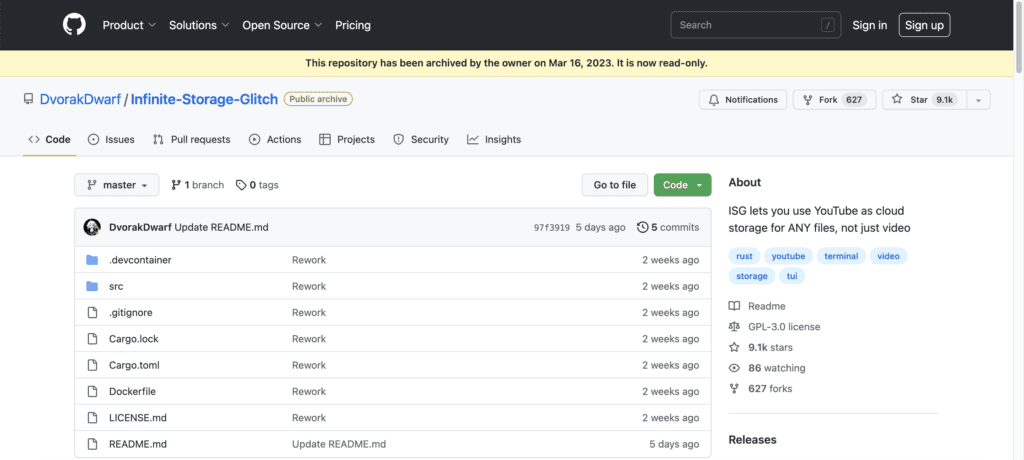
The trick involves using a GitHub project called Infinite-Storage-Glitch (ISG) that uses a video encoder and decoder program to convert any type of file into an AVI video file. Once the output video is encoded, all you need to do is to upload the video to YouTube.
When you want your file(s) back, just download the video from your YouTube account and run it through the decoder program.
Note:The following steps require running Terminal commands. It’s recommended that you only proceed further if you are familiar with docker & terminal and know what you’re doing.
Installation
To install ISG, you can build it from the source or use docker. The docker method is recommended as it is easier to build and has lesser external dependencies. The below guide will help you install and use ISG on your computer.
Note:The commands listed here are typically Linux-based but should also work on a Mac. If you have a Windows system, it’s recommended to install WSL.
- Install Docker if you haven’t already. In the terminal, run the following command:
$ sudo apt install docker-io - Install Git if not already done.
- The following command lets you run docker without “sudo” privileges:
$ sudo usermod -aG docker [YOUR-USERNAME] - Clone the repository:
$ git clone https://github.com/DvorakDwarf/Infinite-Storage-Glitch.git - Go to the project directory:
cd Infinite-Storage-Glitch - Once it is done, execute the following command to build the Docker image:
$ docker build -t isg .
$ docker run -it –rm -v ${PWD}:/home/Infinite-Storage-Glitch isg cargo build –release
The process will take some time to complete. Once done, you can find the executable under the target/release directory.
Encode (embed) Video
Once ISG is installed, you can run the executable to embed your personal files into an AVI video file. You can even embed multiple files at once by first archiving the files into a single ZIP file. Let’s consider creating a sample ZIP file called “test.zip” in this example.
- Move the “test.zip” file under the root of the Infinite-Storage-Glitch folder.
- Use the “pwd” command in the Terminal window to ensure you’re in the root directory, i.e., Infinite-Storage-Glitch.
- Run the following command:
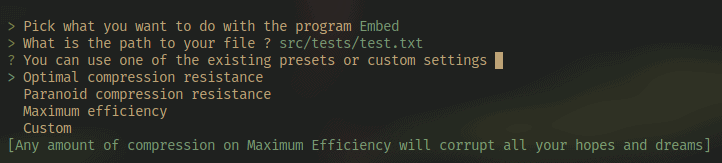
$ docker run -it –rm -v ${PWD}:/home/Infinite-Storage-Glitch isg ./target/release/isg_4real embed - The program will now ask for the file path. Provide the location of the file where you’ve placed the test.zip folder. In this case, it is: /home/Infinite-Storage-Glitch/test.zip.
- Next, select the compression method. Usually, the “Optimal compression resistance” option will provide the best results.
The embedded video will be saved as “output.avi” in the project’s root folder. After that, you can log in to your YouTube account to upload the video. Once uploaded, you might also want to make it Private, so others cannot access the file.
- Go to “studio.youtube.com” on your favorite browser.
- Click on Create and select your video file to upload it. If no issues are found, you should see the message: “Checks complete. No issues found”.
- Provide a suitable title and description, and click Next.
- In the visibility section, choose “Unlisted” if you want to give access to your video to anyone with a valid URL or “Private” to restrict access only to yourself.
- Click Save.
Your encoded video is now hosted on YouTube.
Decode (dislodge) Video
To decode your encoded video, you need to download it first. ISG provides a download utility that allows you to download your video from its URL (the video needs to be either Public or Unlisted for this to work):
- Run the following command in the terminal:
$ docker run -it –rm -v ${PWD}:/home/Infinite-Storage-Glitch isg ./target/release/isg_4real download - Provide the URL of the YouTube video.
The downloaded video will be available in MP4 format.
Alternatively, you may download your video directly from YouTube Studio.
Once downloaded, you need to run the dislodge program to decode the video and get your files back.
- Move your downloaded video under the root of the Infinite-Storage-Glitch folder.
- Run the following command in the terminal:
$ docker run -it –rm -v ${PWD}:/home/Infinite-Storage-Glitch isg ./target/release/isg_4real dislodge - Provide the full path of the downloaded video. For example, /home/Infinite-Storage-Glitch/downloaded_2023-03-20_13-14-10.mp4, where “downloaded_2023-03-20_13-14-10.mp4” is the name of the downloaded file.
- Provide the name of the new decoded file. For example, “test_decoded.zip”.
Wait for the process to complete. Your decoded ZIP file will be available in the Infinite-Storage-Glitch folder.
How ISG works?
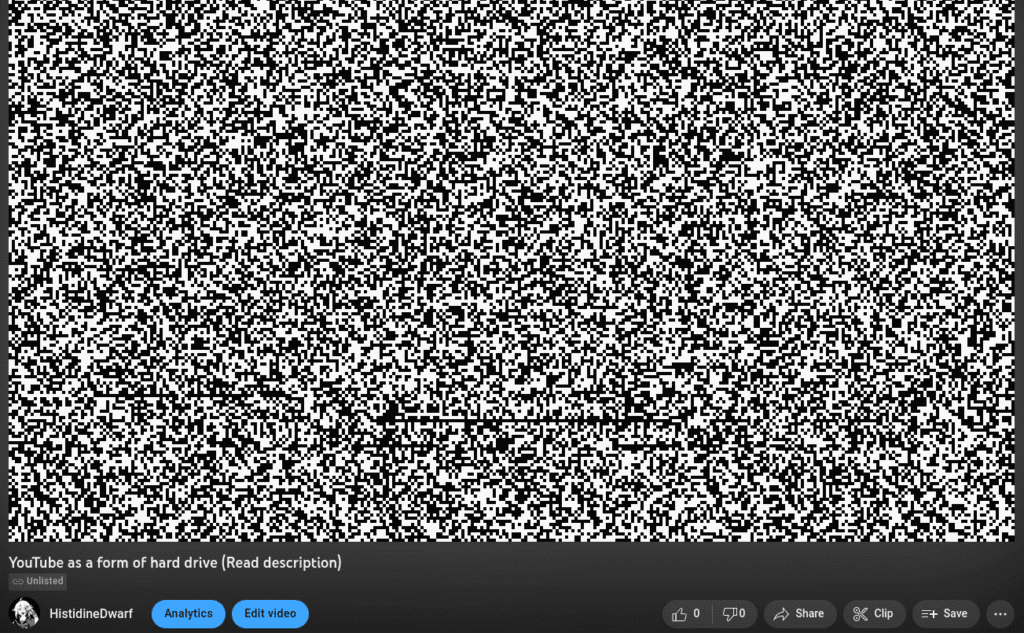
The basic principle is simple: Files comprise several bits of binary data. Each byte can be represented by a pixel. An array of pixels create a video frame. Stitch multiple frames together, and an extended data string can be encoded as a video file.
In RGB encoding, each pixel can hold 3 bytes of data represented by the pixel’s color. Hence, it’s an efficient encoding method. But this method is sensitive to color changes, and your embedded data will likely be corrupted.
Instead, ISG uses binary encoding where each pixel is black or white, representing a single bit (0 or 1) of your data stream. Thus, this is a less efficient form of encoding but also least affected by YouTube’s compression.
Issues/Caveats
As the developer mentions, ISG is not recommended as an alternative to cloud storage solutions but rather as an occasional “party trick” to wow your friends and peers. There are several reasons for this:
- The encoding/decoding process is CPU-intensive and may take a long time to complete execution, depending on your processor speed and the size of your data file(s).
- The resultant video file may be several times larger than your original file(s).
- You may be breaking YouTube Terms of Service by uploading a video generated by ISG on YouTube.
- In the future, YouTube may force a takedown of the app, causing the app to no longer be available to download.
You may still use YouTube as a storage solution for your smaller files. But you also need to accept the risks and consequences of your actions, which may include (but are not limited to) the following:
- Losing access to your data as a result of your video being taken down by YouTube due to a breach of YouTube TOS.
- Losing access to your data due to no longer having access to the tool (unable to decode the previously uploaded video).
- Facing YouTube account ban due to breach of TOS, and so on.
In short, treat this article as a fun educational project rather than a way to use YouTube as an online file storage solution.