If you’ve heard enough of “Reflection” or “Opening” every time your iPhone rings, you might want to set a custom ringtone instead of the default ones.
Officially, you can do this in two ways:
- Purchasing ringtones from the iTunes Store on iPhone
- Using iTunes on a Mac or Windows computer
However, both of these methods have some drawbacks. The first provides a collection of pre-made ringtones that one needs to purchase, while the second requires a computer to work.
In most situations, you may already have a song or track in mind that you want to trim and make into a ringtone directly from your iPhone without using a computer. In this article, we’ll explore an easy way to make and set custom ringtones on the iPhone.
Prerequisites:
Before going any further, here are a few things to consider:
- Garageband is required: GarageBand is a free music creation app developed by Apple. Currently, GarageBand is the only iPhone app that allows you to export audio files as ringtones without a computer.
- Use DRM-free music: Music from streaming apps like Apple Music, Spotify, etc., are DRM-protected, and can’t be used to make ringtones. You can, however, remove DRM protection from such music and use them to create ringtones.
Without further ado, here’s what you need to do to make and set custom ringtones from music files on iPhone, without iTunes or computer.
Prepare your Custom Ringtone
Even though the iPhone allows a maximum ringtone length of 40 seconds, most times, your carrier will only allow up to 30 seconds of ring, beyond which, you usually don’t get to hear.
So, we can create such a 30-second ringtone from an audio clip using an app available on the App Store. Here, we’ll use an app called Ringtones Maker.
- Install Ringtones Maker from the App Store and open it.
- Tap on the “+” icon from the bottom of the screen and select the Source.
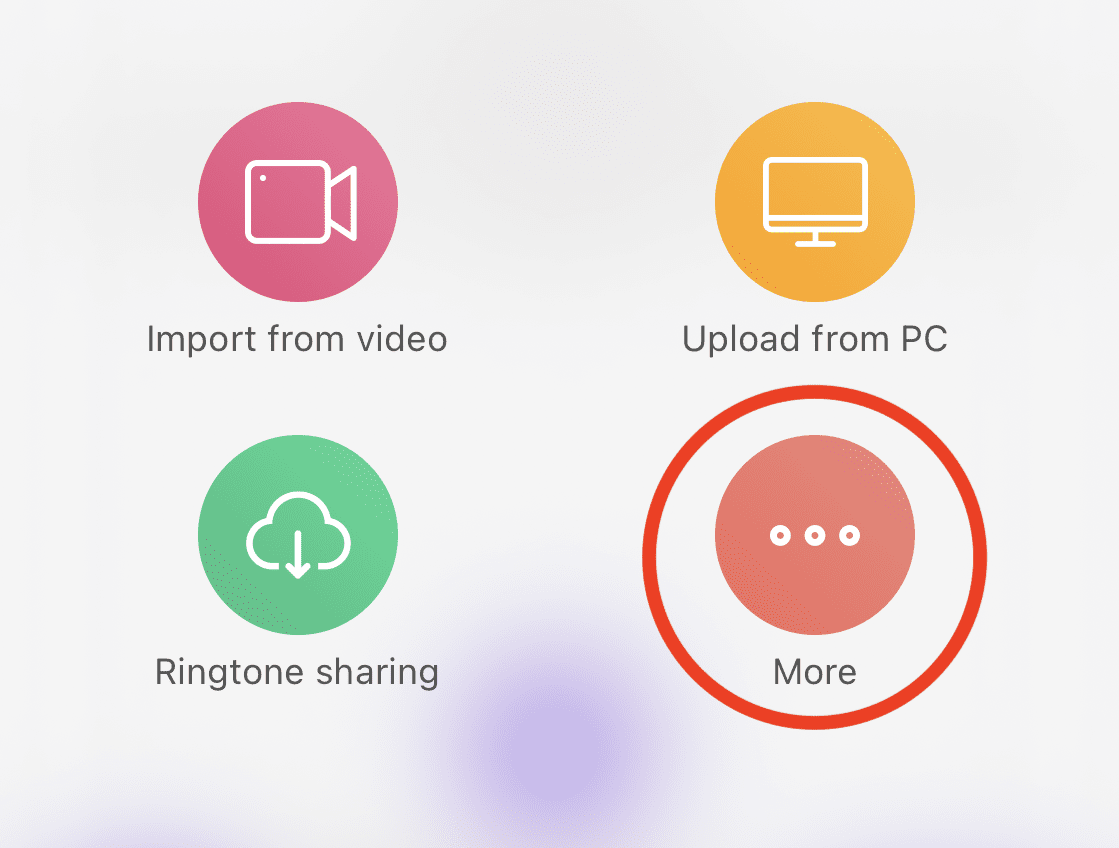
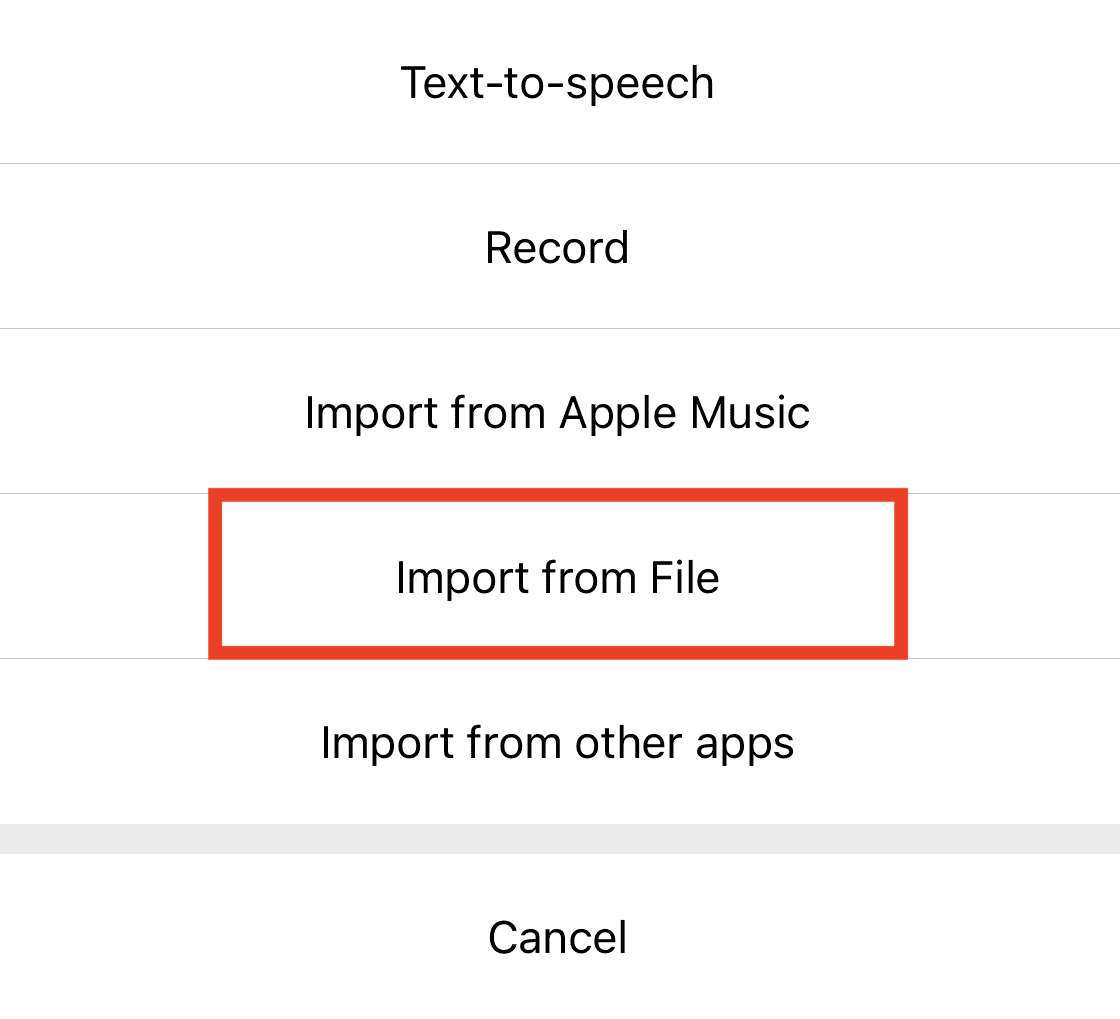
- If your audio file is stored in the Files app, tap More >> Import from File.
- Browse and select the desired audio file. Wait for it to be imported into Ringtones Maker.

- Tap on the little Arrow (>) on the right side of the imported file to reveal associated options.
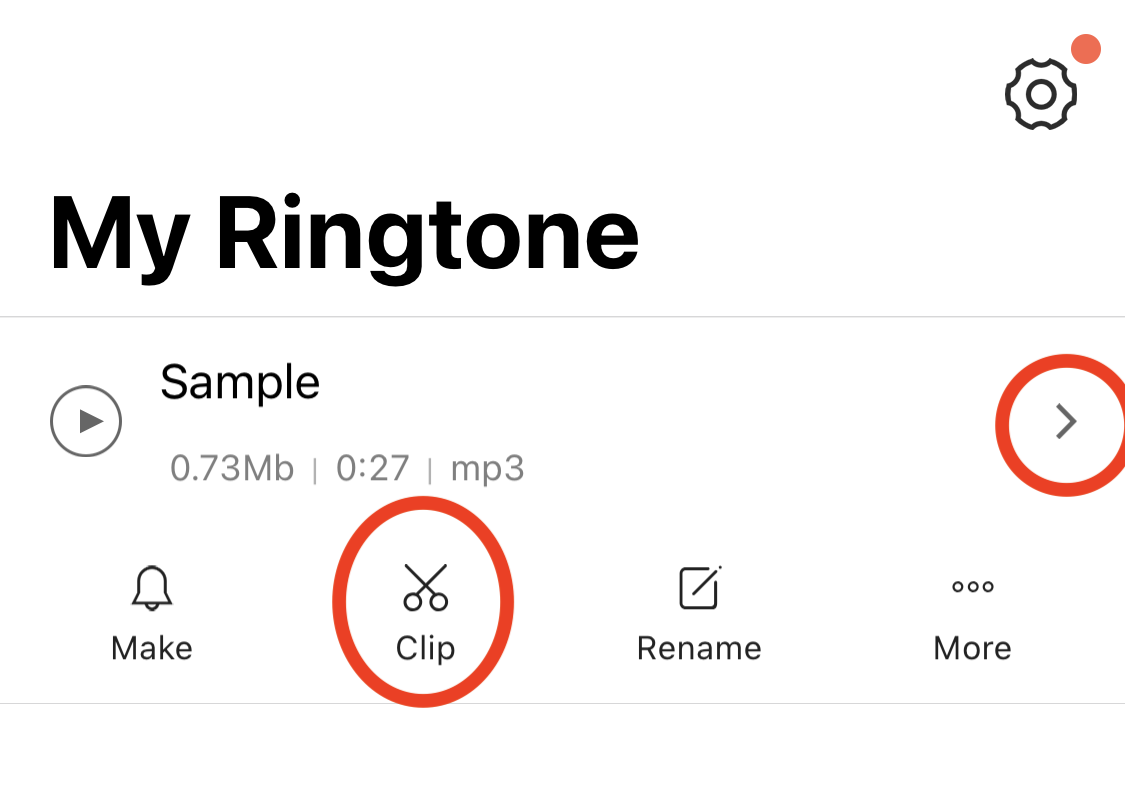
- Select Clip. You’ll be able to edit your tone here.
- Scrub the Start and End points or use the controls to trim your ringtone. You can also add Fade In and Fade Out effects.
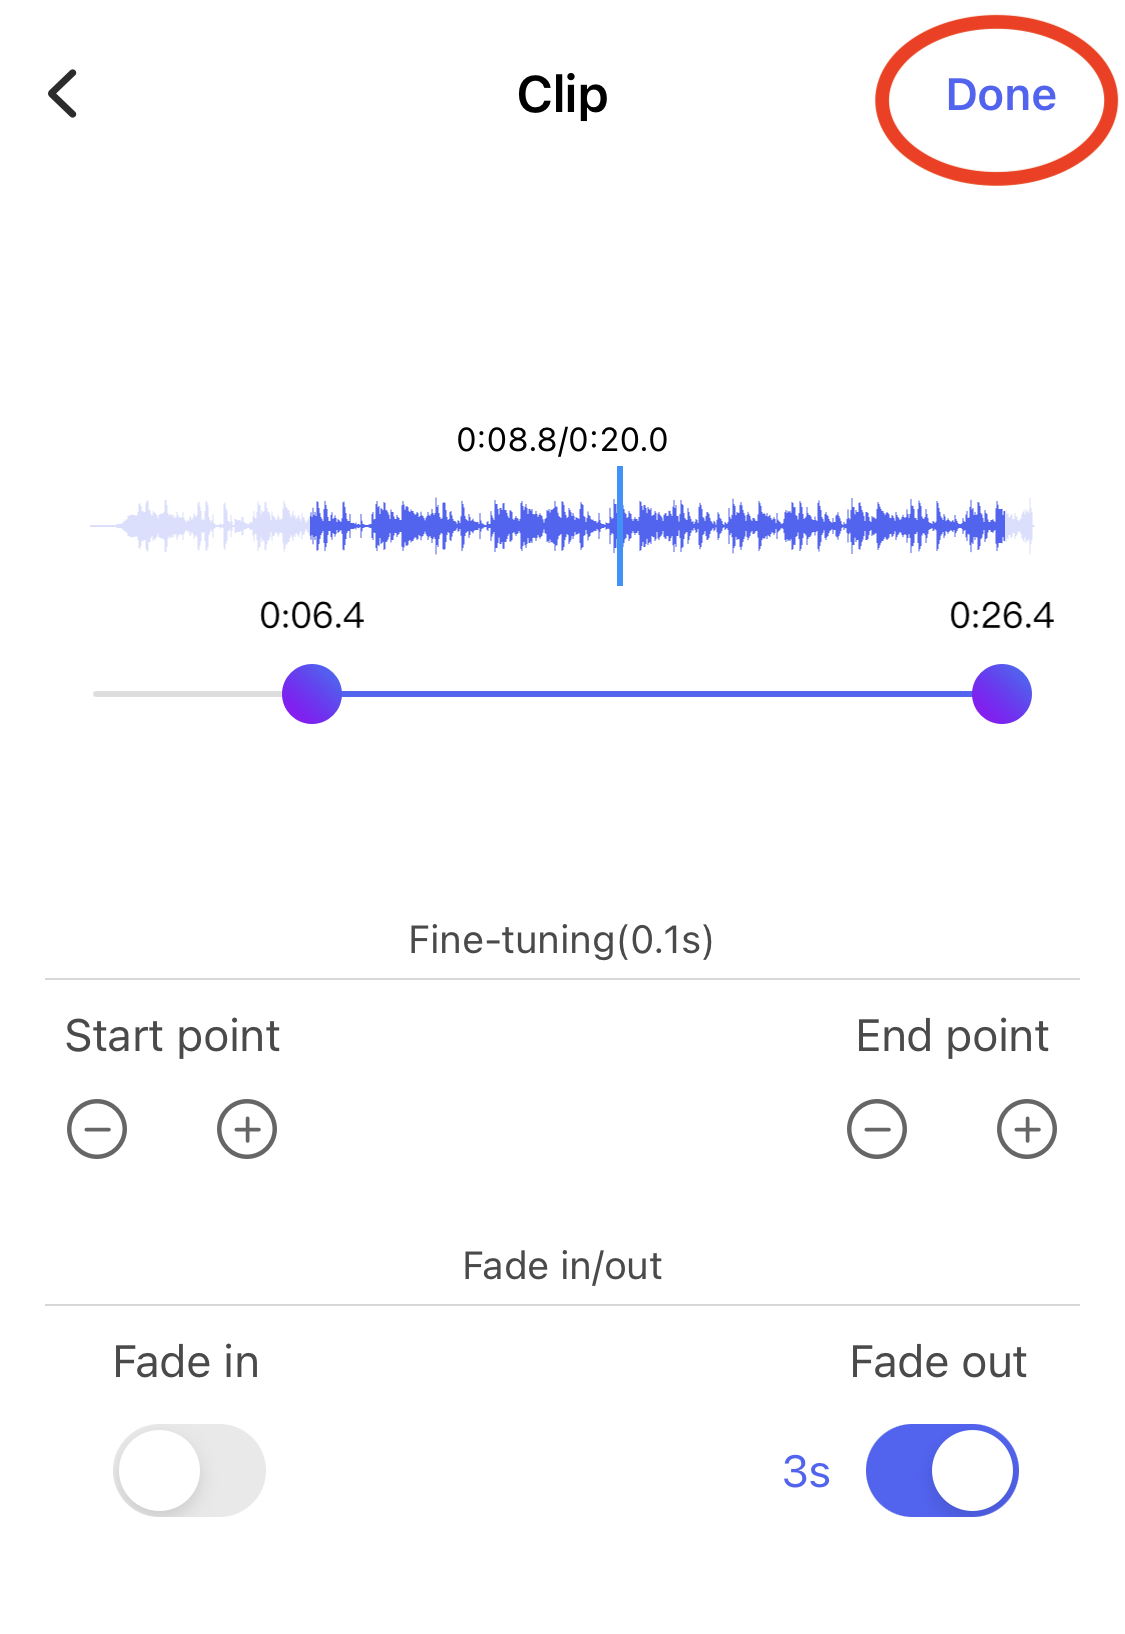
- Tap Done from the top-right corner once you’re satisfied with your edit.
A second (M4R) file will be now available in the app, containing your edited audio track.
There are other alternatives to Ringtones Maker available on the App Store offering similar features. One other such app you might be interested in is RingTune – Ringtones for iPhone.
Set Ringtone on iPhone without iTunes or Computer
Now that you’ve created the ringtone, you need to set it as your ringtone for calls. The below steps will guide you through the process.
- Open the Ringtones Maker app.
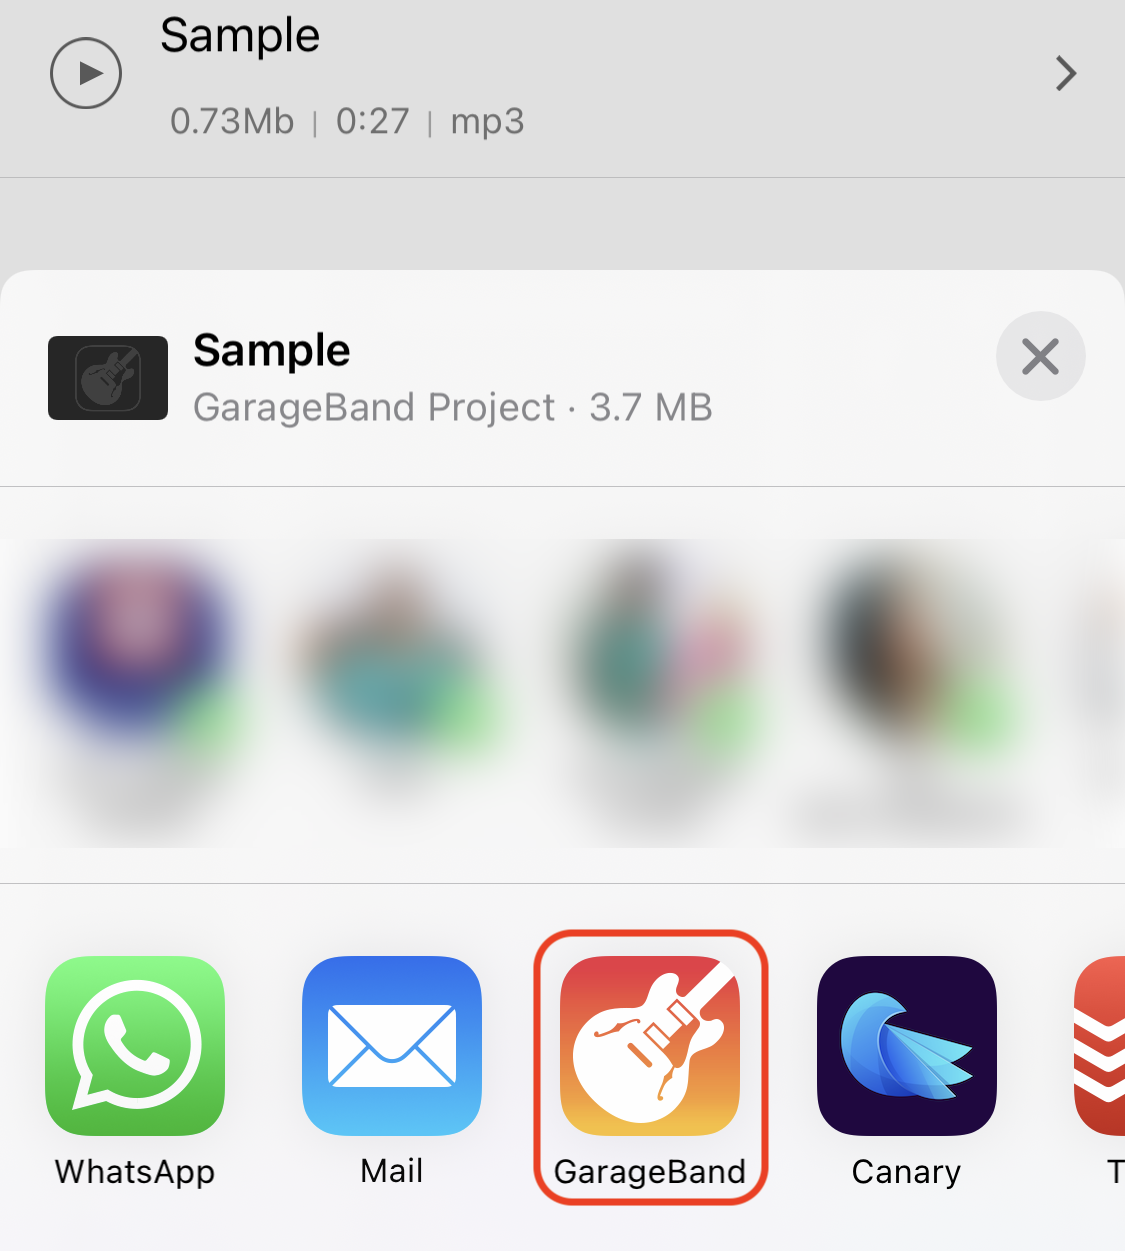
- Tap on the Arrow (>) next to the M4R file (from the last section), and tap Make to bring up the Share menu.
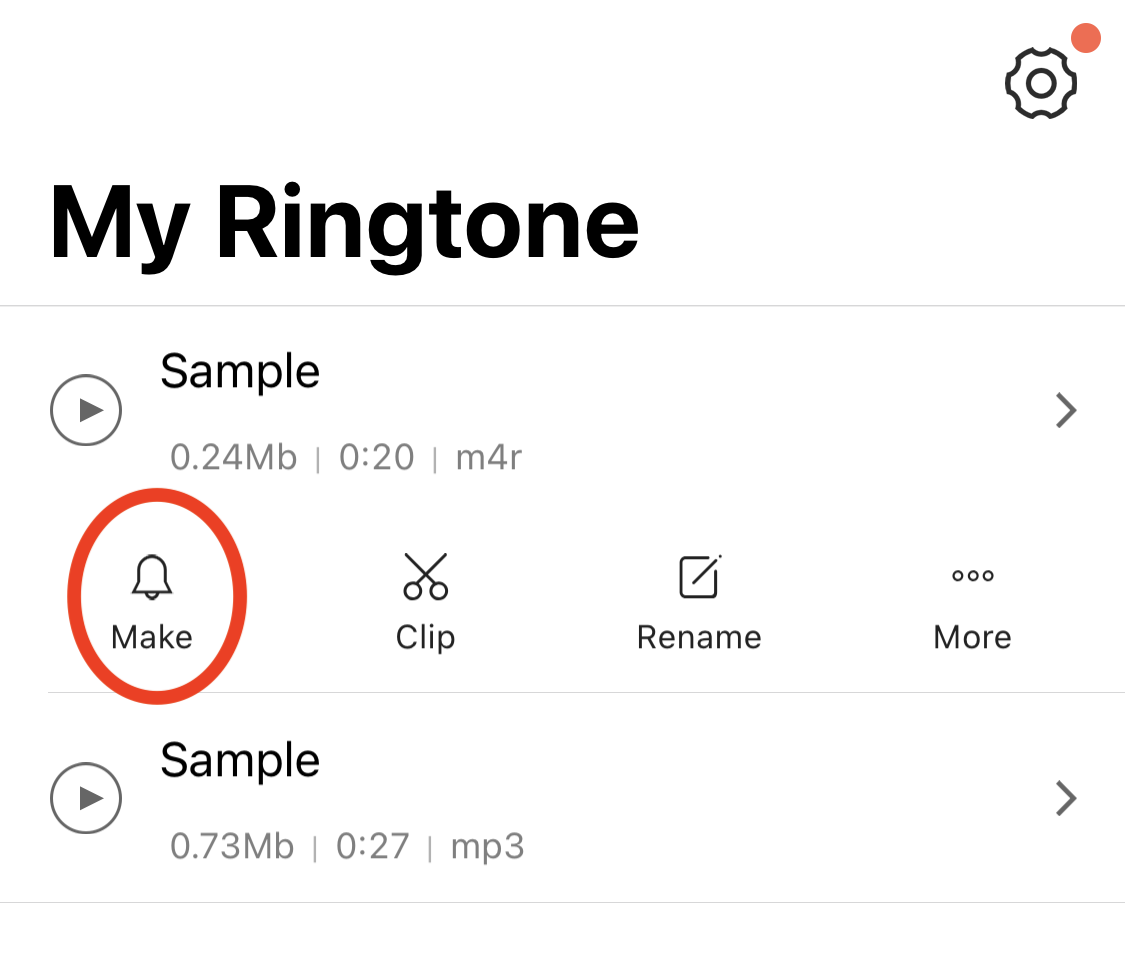
- Select GarageBand. You’ll be redirected to the GarageBand app, and the custom ringtone you created will be available as one of the projects.
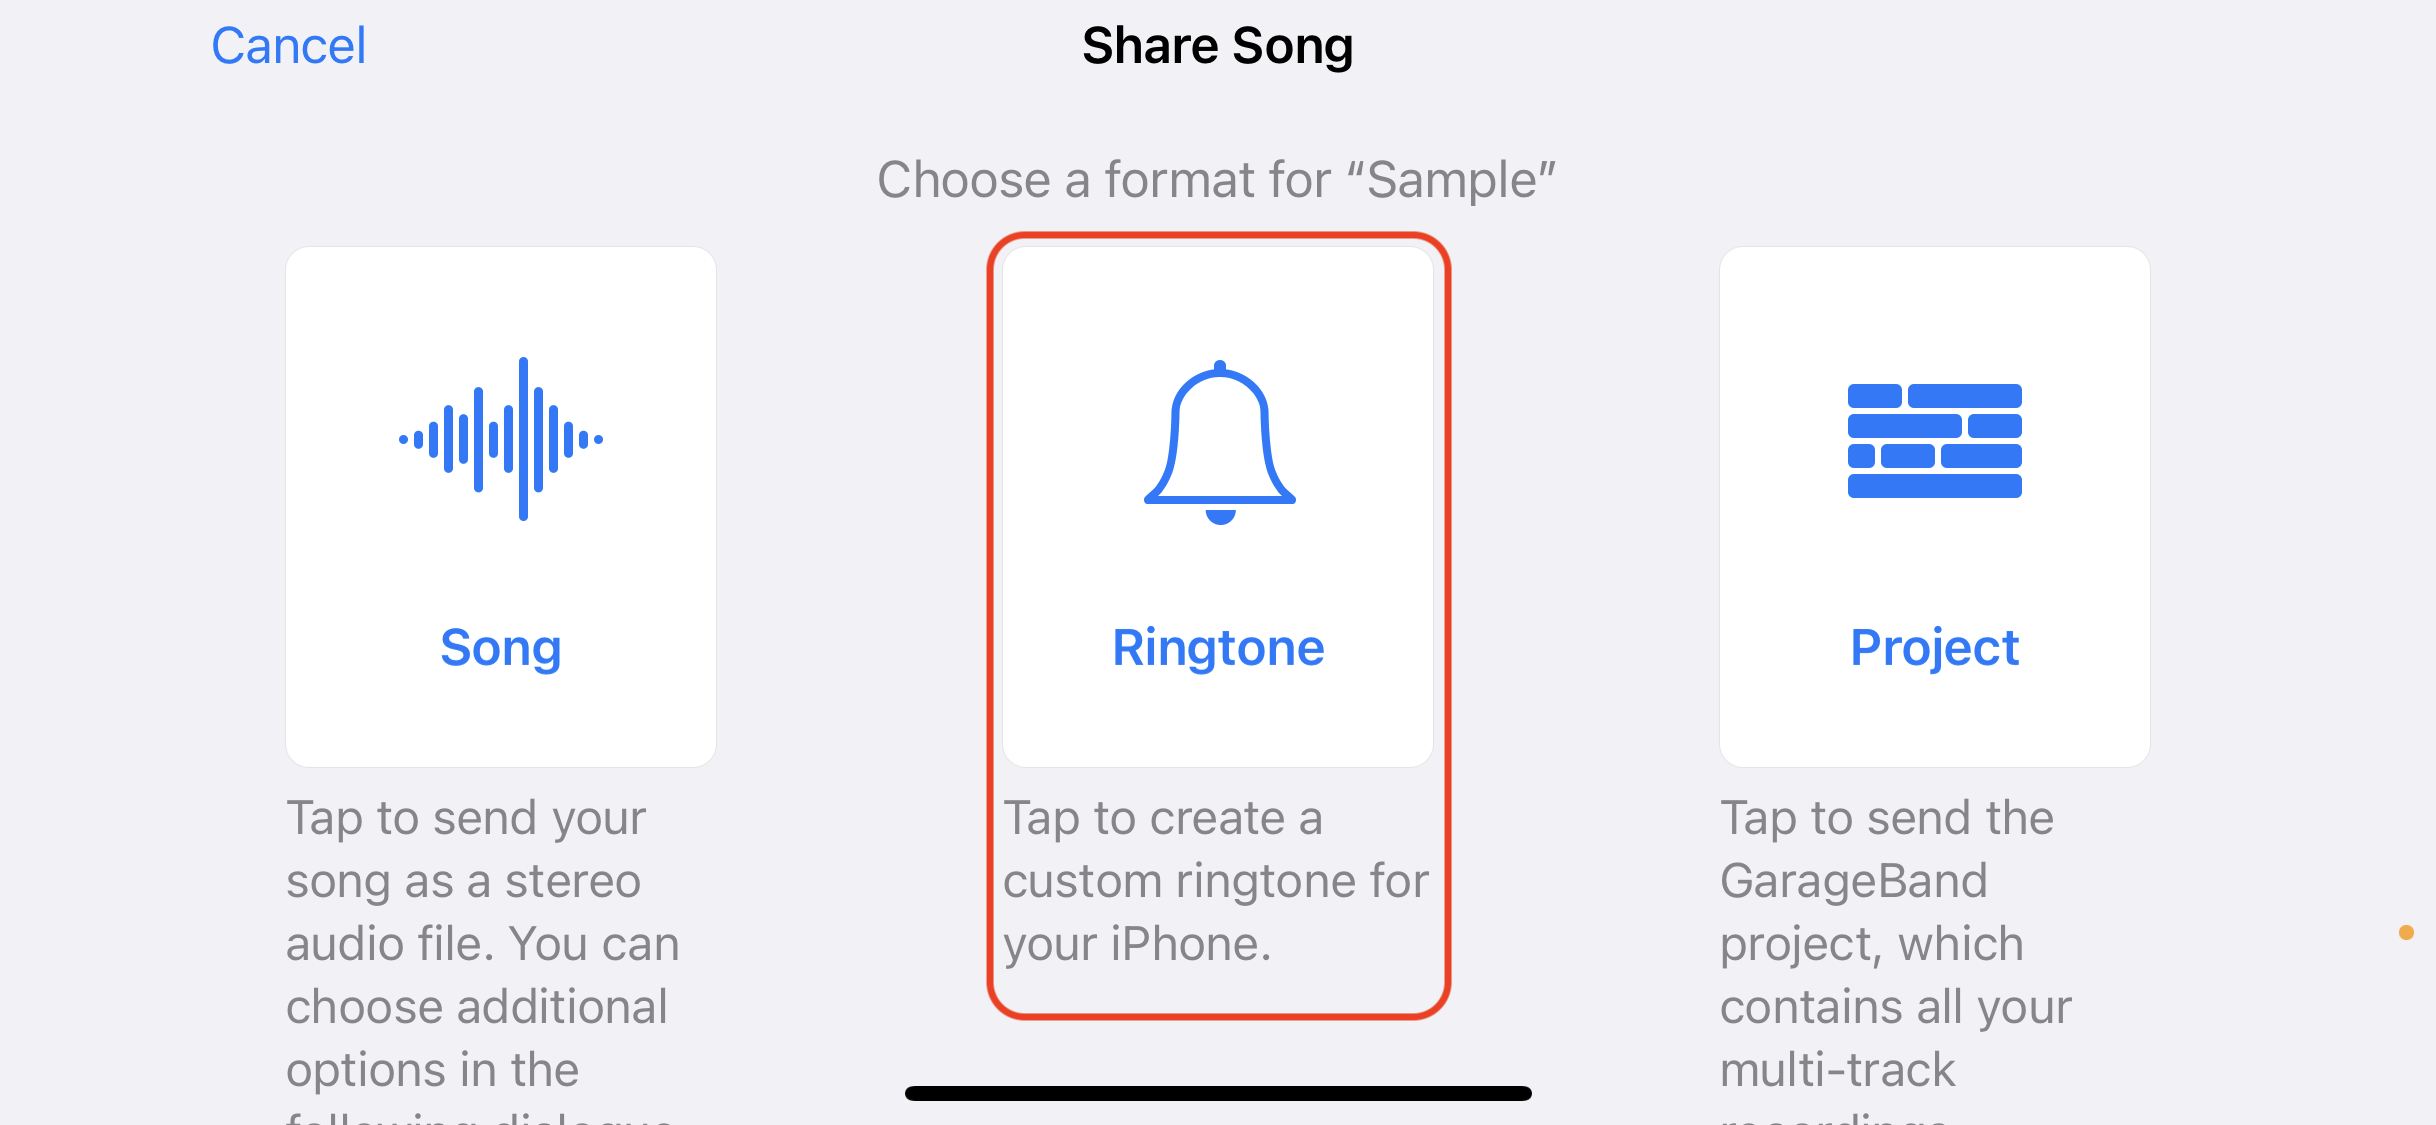
- Tap and hold the most recent project having the same name as that of the ringtone from the Ringtones Maker app, and select Share again.

- Choose Ringtone.
- If you get a pop-up saying “Your ringtone length needs to be adjusted”, tap Continue.
- Change the name of the ringtone if required, and tap Export from the top-right corner.
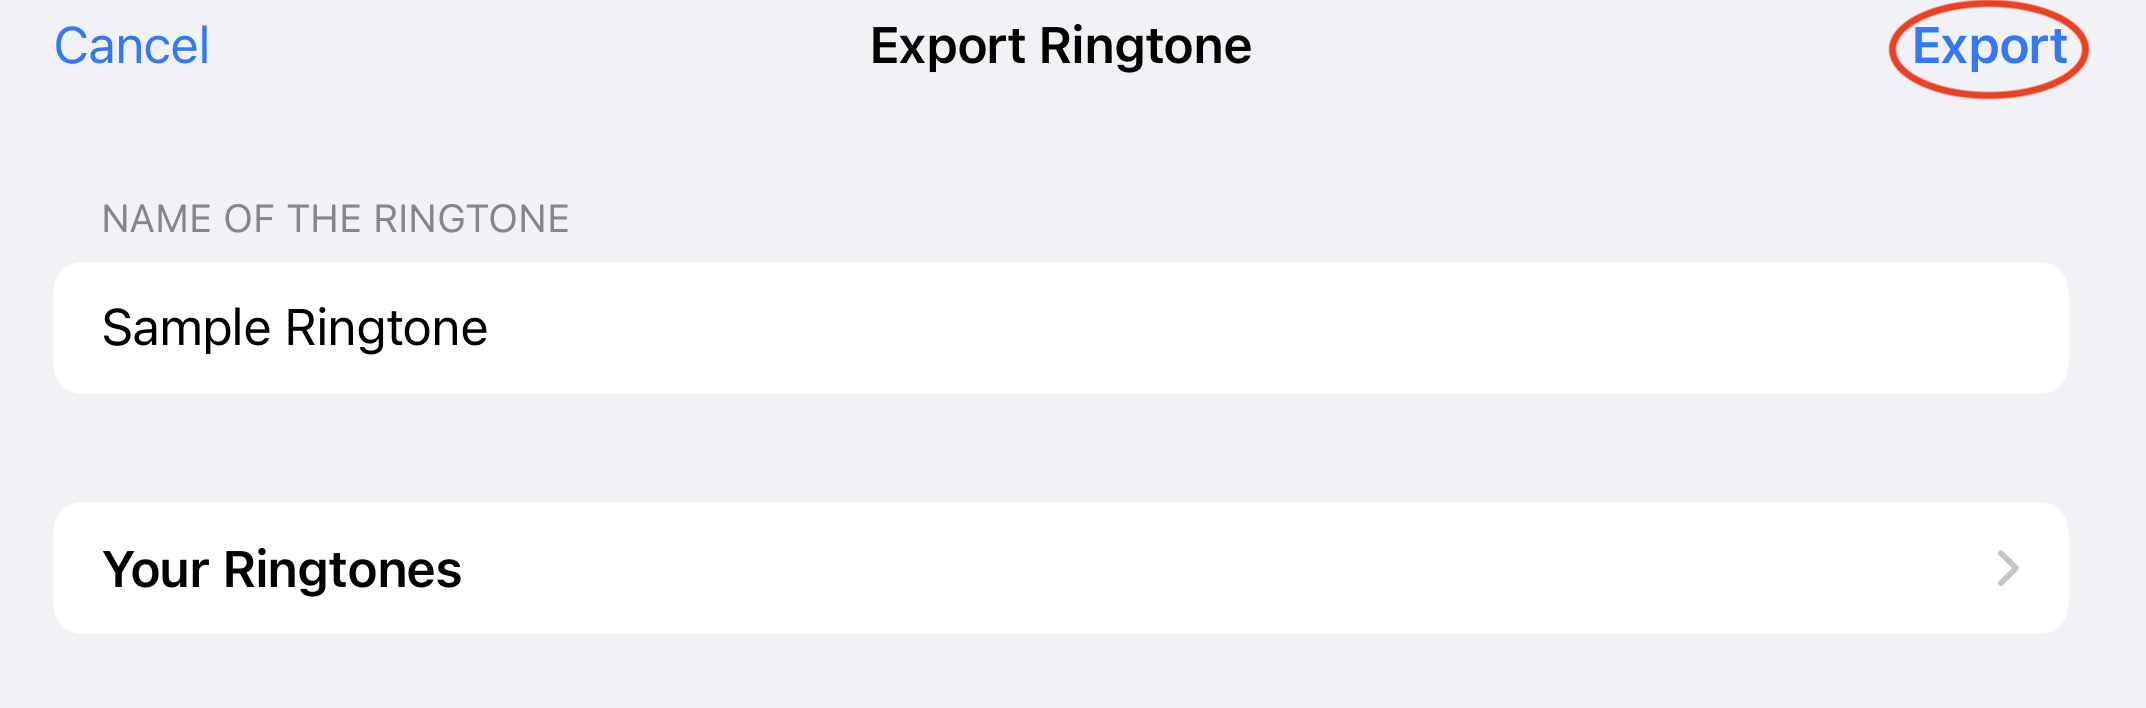
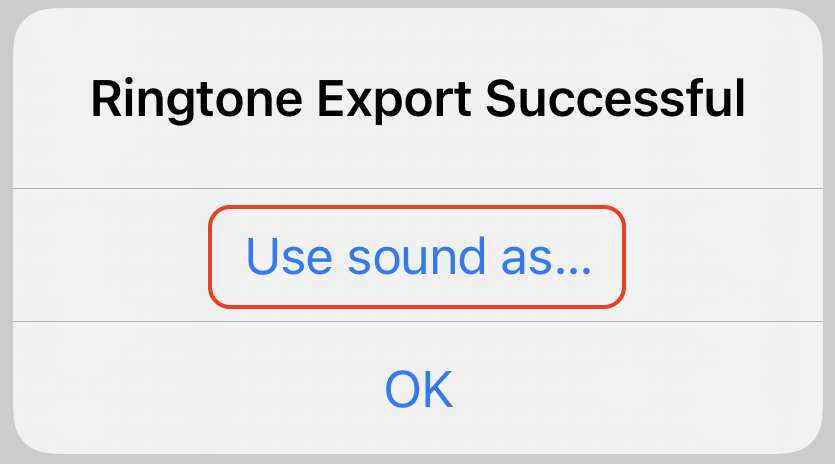
- After the export is completed, you’ll get a pop-up as Ringtone Export Successful. Here, tap on “Use sound as…”.
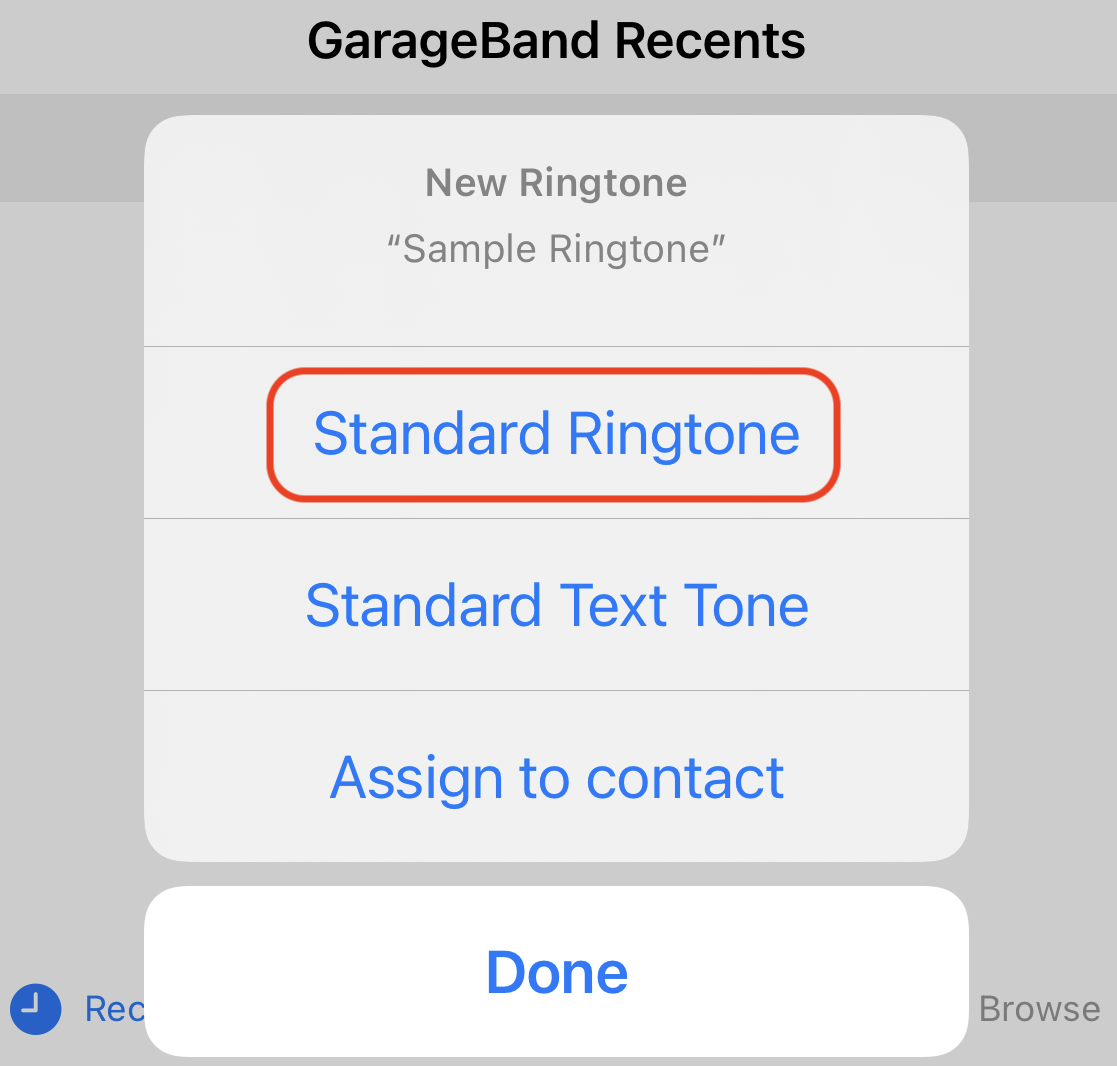
- Select Standard Ringtone. The ringtone will be saved in your system Ringtones list.
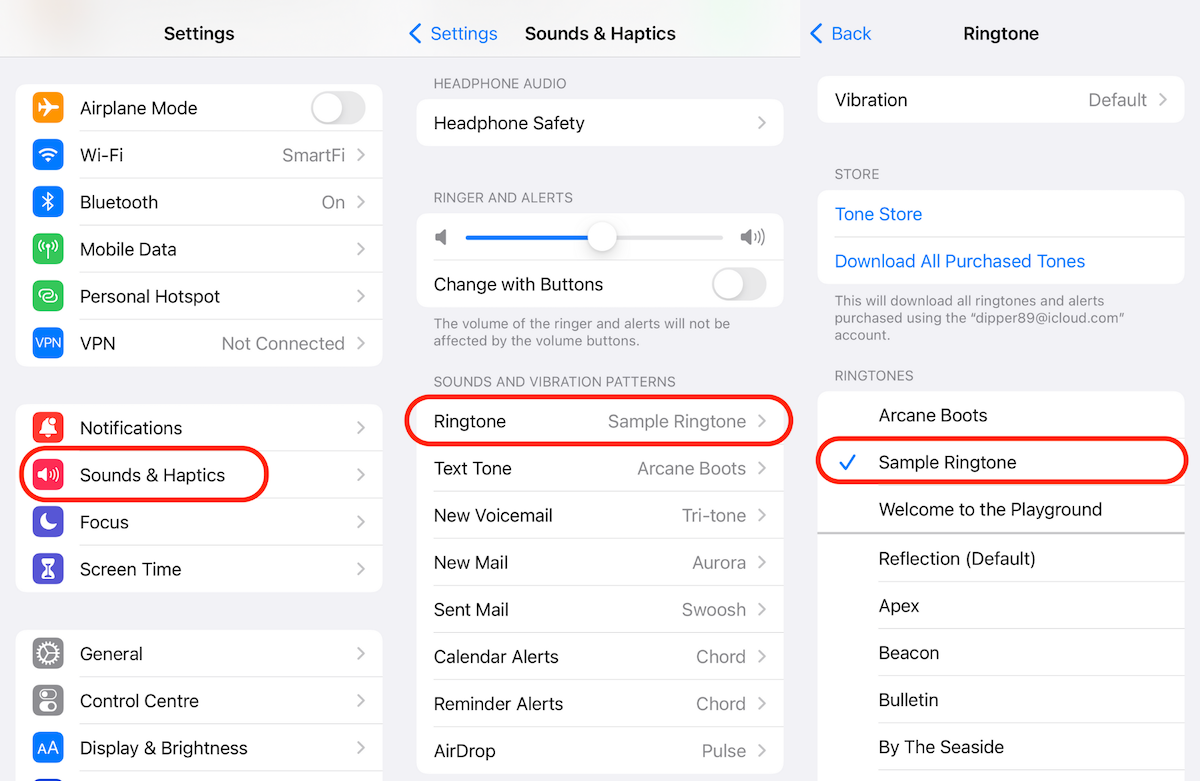
To set the new ringtone for calls, go to Settings >> Sounds >> Ringtone, and select the custom ringtone you created from the available list.
Alternatively, you can set this for specific contacts by opening the Contacts app, tapping a particular contact, tapping Edit from the top-right corner, then scrolling down and selecting the Ringtone. Finally, tap Done from the top-right corner to save the changes.
Set Ringtone without GarageBand & iTunes
If you’re looking for a way to set custom ringtones on iPhone without GarageBand, currently there’s no way to do it without a computer. However, given that you do have a computer, here’s a way that is much more convenient compared to using iTunes.
Although multiple macOS and Windows apps provide the option to set a ringtone on iPhone without iTunes, one of them is especially convenient as it uses proprietary technology to create and set ringtones with a few clicks. This app is iRingg from Softorino.
iRingg is a dedicated ringtone creation app for macOS and Windows that provides an easy-to-use interface for importing audio from different sources (including background music from online videos), trimming the audio to 30 seconds to extract the ringtone portion, and pushing the trimmed file to your iPhone ringtones.
All the required conversion & configuration required to set the desired audio clip as a ringtone happens under the hood. And once the ringtone is pushed to your iPhone, head over to the Settings app on the device, then navigate to Sounds >> Ringtone, and select the custom ringtone you created from the available list.