Smartphones store sensitive data that we may occasionally refer to while going about our day. Unfortunately, they’re also prone to hardware and software issues, as well as physical damages caused by accidents or otherwise. iOS devices (iPhone and iPad) are no different.
In such unfortunate scenarios, users risk losing valuable data (photos, music, video, contacts, bookmarks, and more) that they may not have a copy of elsewhere.
iOS data recovery solutions help export accidentally deleted or lost data from iPhone and iPad in various emergencies. In case of hardware faults (such as broken screen or irresponsive touch), you can plug in the device to your computer via USB and try to export sensitive data. In the case of software issues, system recovery options can help restore it to the normal state.
Now, there are several iOS data recovery apps available for Windows and Mac. In this article, we’re going to explore a particular one, called PhoneRescue by iMobie.
Recover iOS data with PhoneRescue
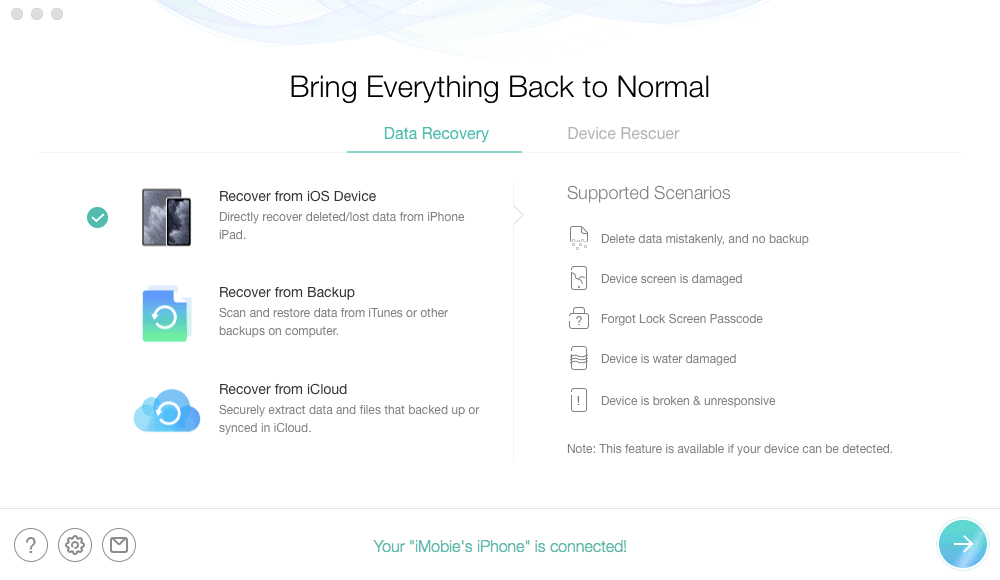
PhoneRescue automatically detects an iPhone or iPad when it’s connected to a computer. Once connected, the program offers three basic recovery options.
Recover from iOS device
This option is handy for recovering deleted or lost iOS data directly from the device. The program attempts to create a backup of your iPhone or iPad, scans the backup data, and then lists it under various categories depending on the type (such as Contacts, Call History, Messages, Voicemail, Calendar, Notes & Reminders, Safari Bookmarks & History, Photos, Personal Videos, etc.)
To recover and data, select the appropriate category from the left panel and choose the items that you wish to recover from your iOS device. You can filter the item list to show all data, only deleted data, or only existing data.
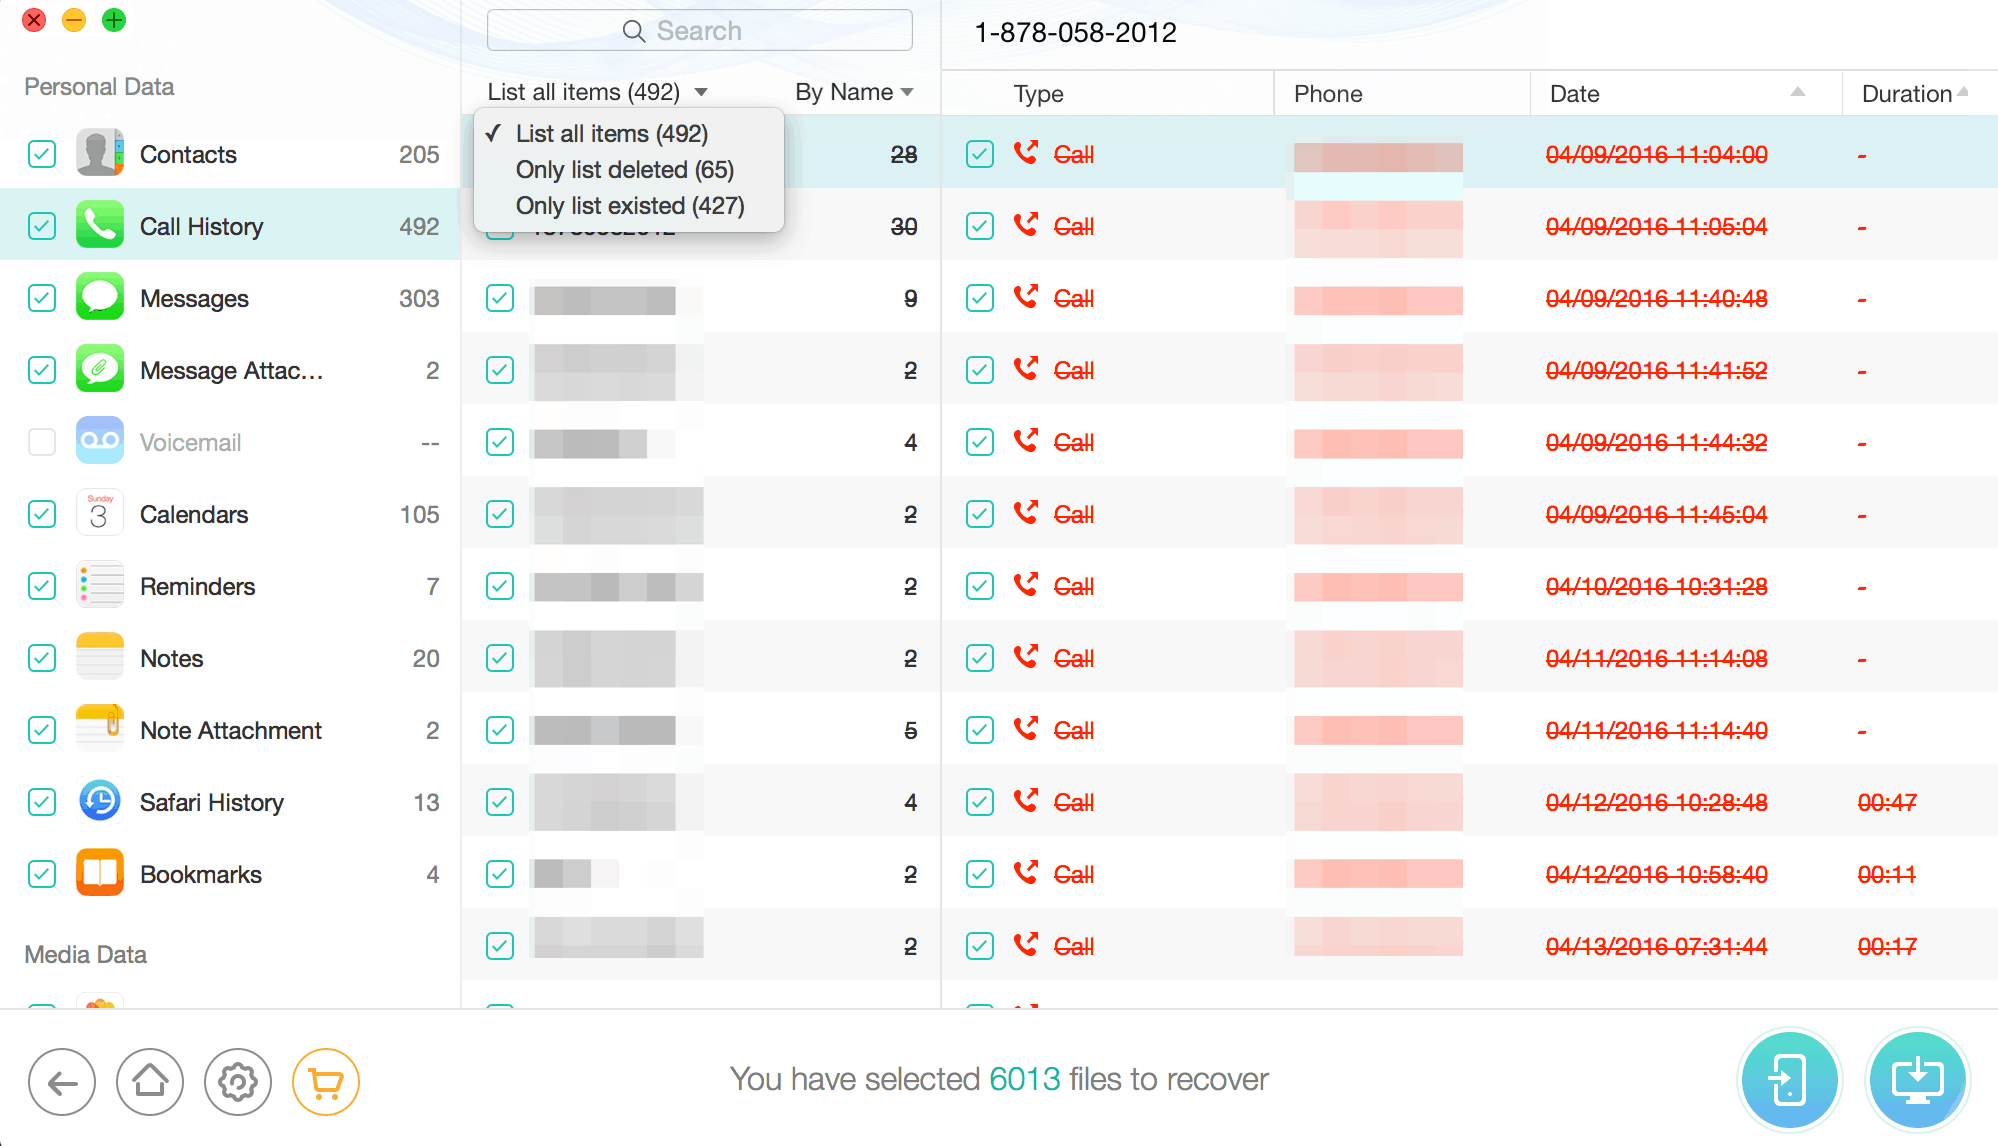
Once you have selected the specific items to recover, you can either choose to export them to your computer or (in case of deleted data) recover to your device.
Once the recovery process completes, you may return to the previous screen or go to the home screen of the program.
Note #1: While creating the device backup, you may need to turn off Encrypted Backups in iTunes of macOS Finder.
Note #2: You may need to turn off Find My (or Find My iPhone/iPad) if you attempt to recover lost/deleted data directly to the device.
Recover from iOS Backup
If you already have an existing iOS backup on your computer, you may want to recover deleted or lost data from it instead of directly from the device.
Open Phone Rescue and choose the second option under Data Recovery and click Next. PhoneRescue will now scan for existing backups on your computer. If no backup is listed, you can browse your folders and manually select a backup file.
If the selected backup is encrypted, PhoneRescue will ask for the encryption password. If you’ve lost or forgotten the password, you can click on the Forgot Password option, which takes you to the Password Recovery Settings interface. Here, you can use iMobie’s Password Recovery brute-force algorithms to attempt guessing the correct password based on specific parameters you provide.
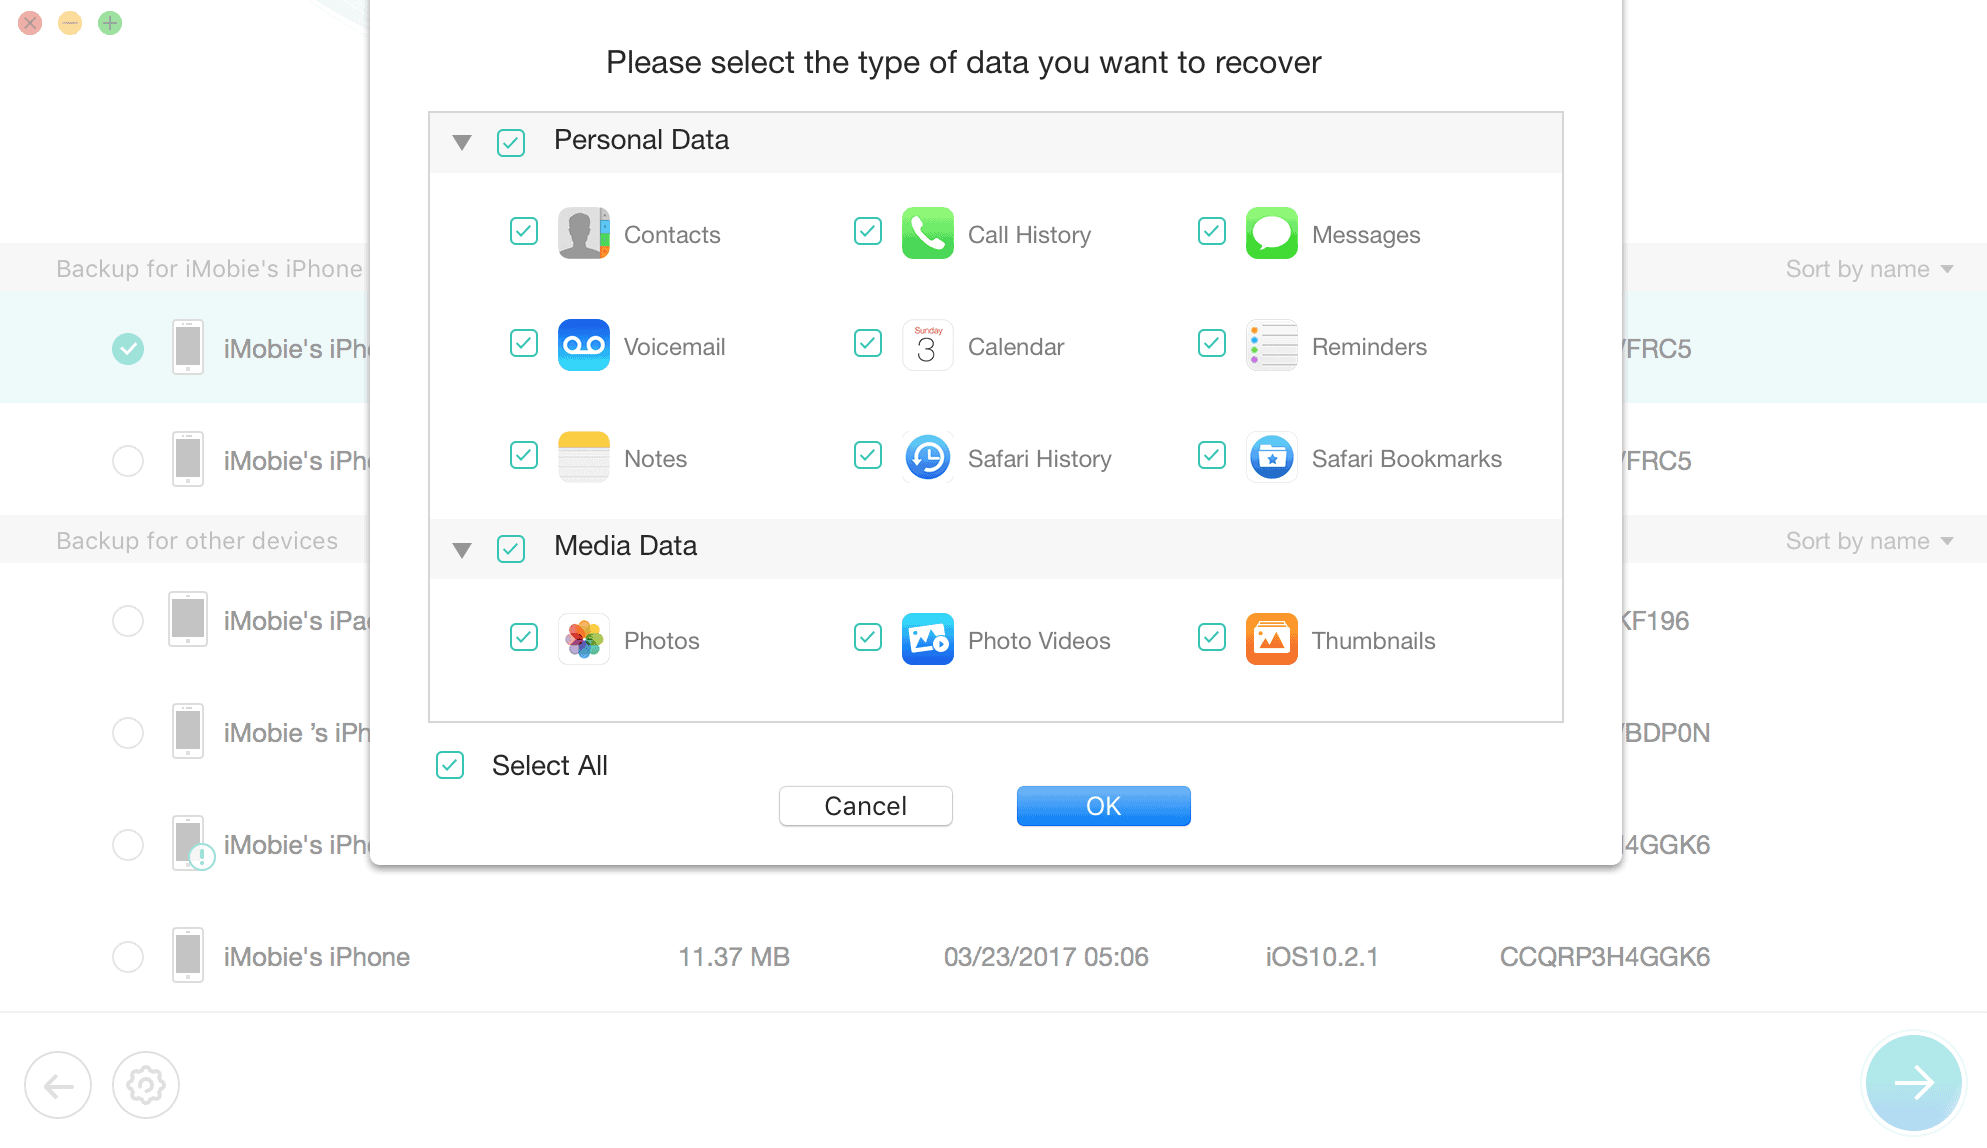
If the correct password is entered or guessed successfully, or if there’s no password, PhoneRescue will begin scanning the backup for available data. After the analysis is completed, the program categorizes the available data into Personal, Media, and App Data. Choose the category of the data you wish to recover and select the specific items from the list.
With the items selected, you can either choose to restore them to your computer or save them to your iOS device (for this, you need to have the iPhone or iPad connected to your computer, and Find My should be turned off in iOS Settings).
When the recovery is completed, you can navigate to the previous screen or go back to the home screen and try a different option.
Recover from iCloud
If you have iOS device backups on iCloud instead of stored locally, PhoneRescue’s Recover from iCloud option allows you to recover data from those cloud backups.
The recovery procedure is similar to Recover from Backup option. After you select the option and click Next, you need to log in to your iCloud account by providing your Apple ID credentials.
Once logged in, you can either attempt to recover personal data directly from iCloud based on available categories (Contacts, Notes, Photos, Personal Videos, Calendars, and Reminders). Alternatively, you can directly scan for available iCloud backups if you need to recover other data.
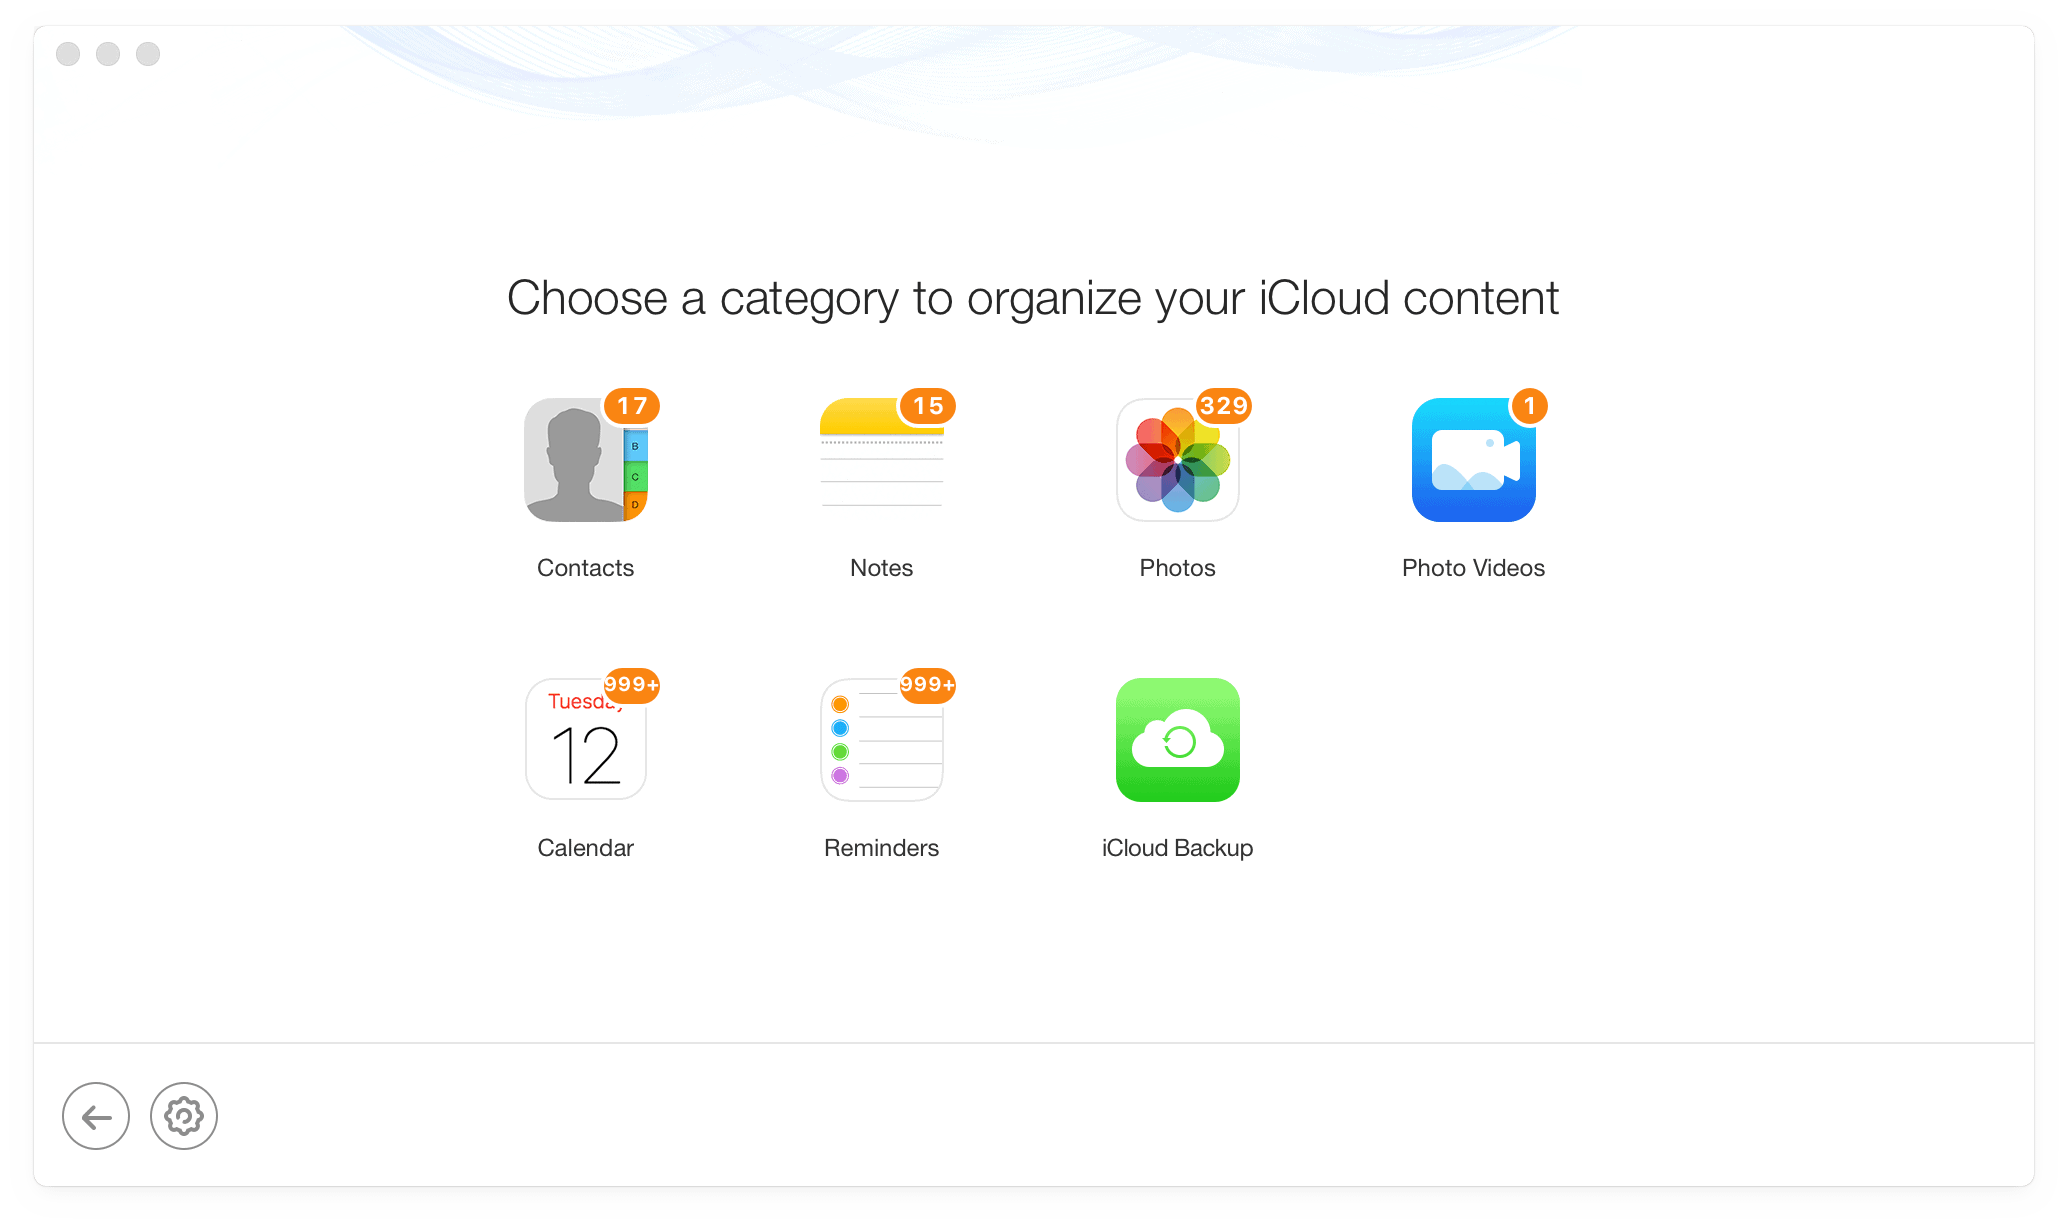
If you choose to recover data from iCloud Backup, PhoneRescue will scan for available backups on your iCloud and list them. Choose the backup you’re interested in click the download button. PhoneRescue will download the selected backup to your computer.
Once the backup is downloaded, PhoneRescue offers you two options. You can choose Only Scan Backup to scan the downloaded backup all available data. Alternatively, if you choose Compare (and have your iPhone or iPad plugged in), PhoneRescue will scan and compare the data available in the downloaded backup with the data on your device, and only display data that doesn’t exist on your device.
In the next screen, just select the data category and choose specific items that you want to recover. Click on Recover to computer to save the selected items to your computer, or choose Recover to device to restore the lost or deleted data directly to your device.
Note: Find My should be disabled on the iOS device to restore data directly to the device.
Rescue iOS Device
Apart from data recovery, PhoneRescue also enables users to restore their devices to normal condition whenever the device malfunctions (stuck in boot loop / Apple logo) and refuses to start up. You can even attempt to restore device access in case you’ve lost or forgotten the Device Passcode / Screen Time passcode.
Repair iOS System (Stuck in Apple Logo, Recovery Mode, Black Screen, etc.)
If your iPhone or iPad is suddenly stuck in a boot loop, black screen, Apple logo, or Recovery Mode, PhoneRescue can help you download a fresh copy of the latest iOS System image and flash it on the device, resetting it to the default state. Once the system image is installed, you can restore device data from a previous iTunes or iCloud backup during the setup process.
To start repairing your device, connect it to your computer, open up PhoneRescue, and go to the Device Rescuer tab. Here, select the first option (Repair iOS System) and click Next.
You’ll get two Repair modes to choose from, the Standard Mode allows you to install the latest version of iOS and reset the device to the normal state. This will delete all your data from the device, but you can restore it from a backup at a later time.
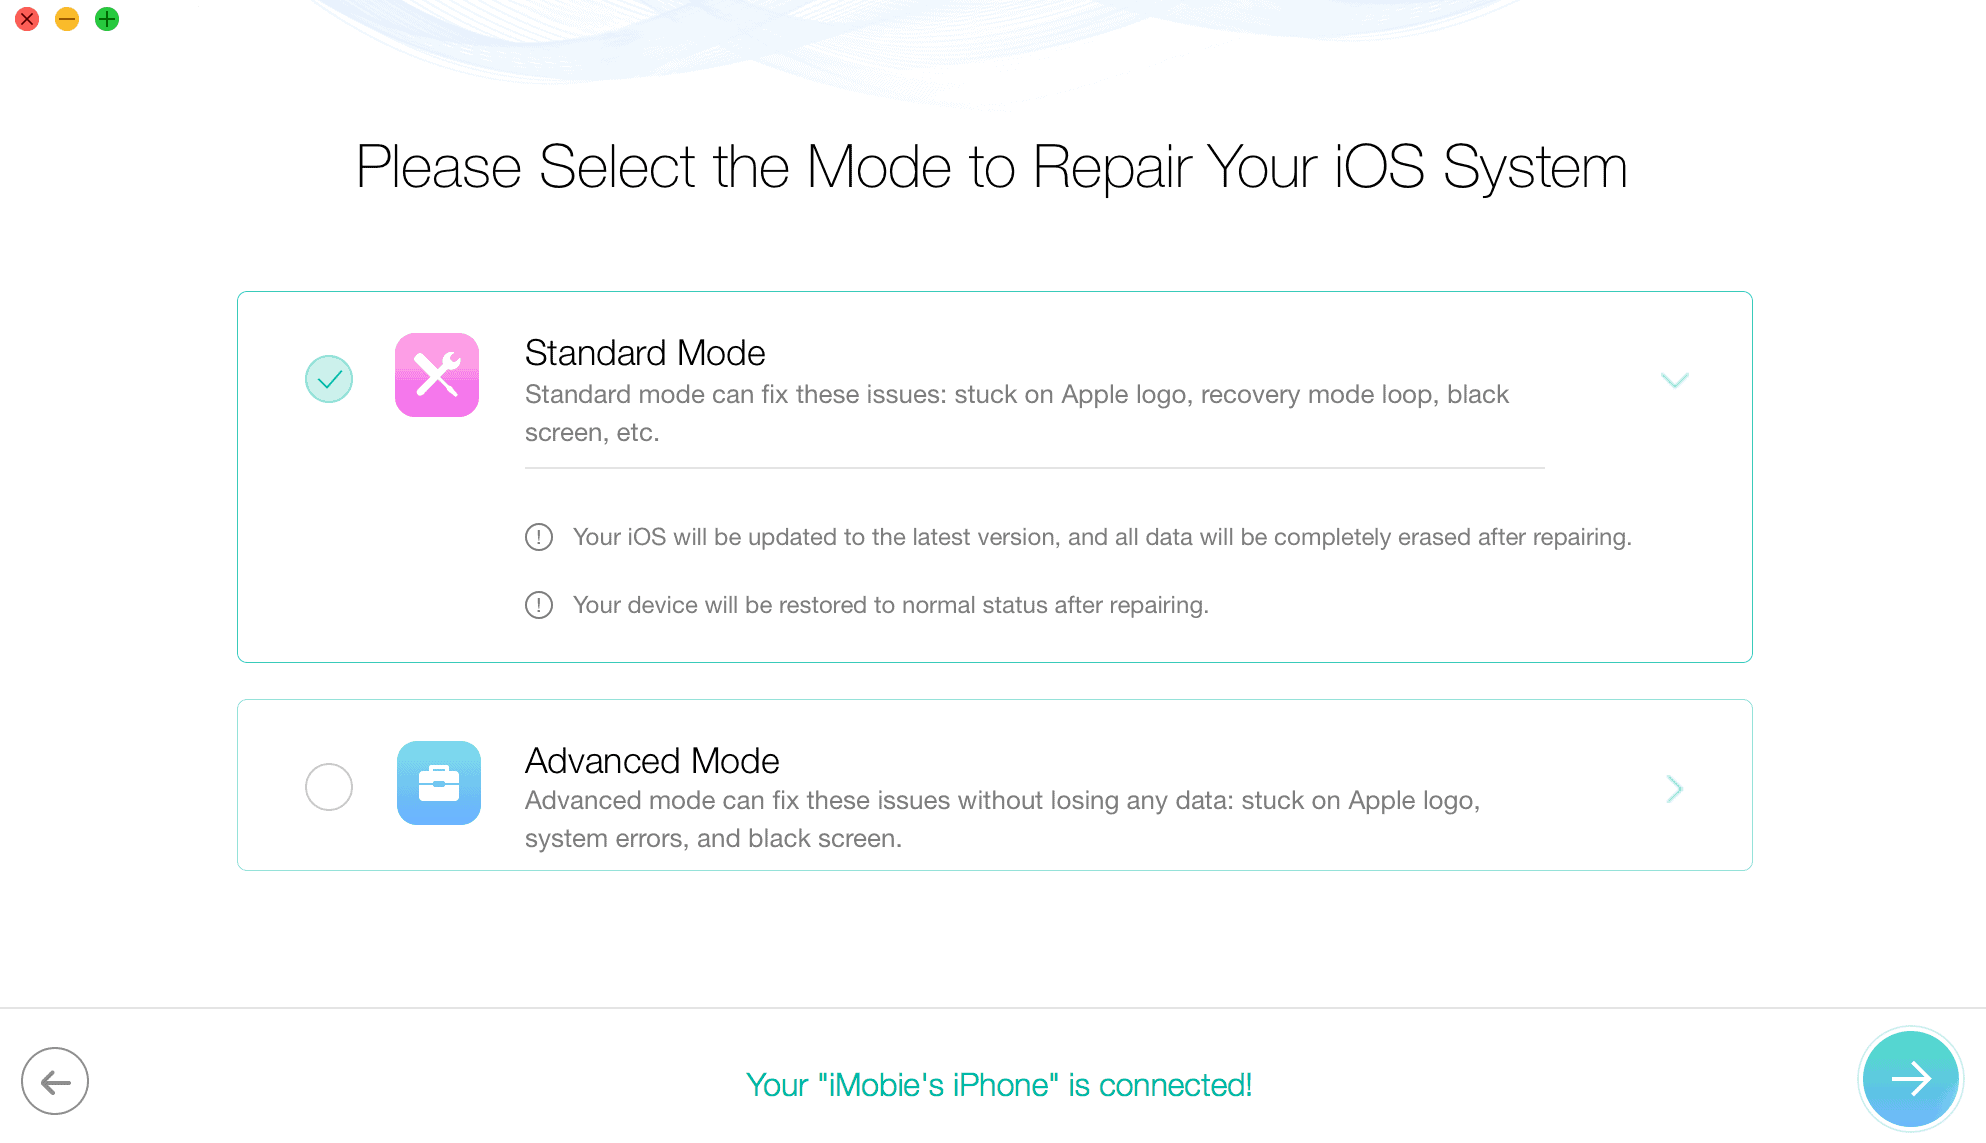
In Advanced Mode, you can install the latest version of iOS and fix booting issues on your iPhone or iPad, without losing existing data on your device.
After selecting the appropriate option, click Next and follow the on-screen instructions to set your device to Recovery Mode. PhoneRescue will detect the device and allow you to download the latest iOS System Image based on the iOS device type and model number.
Once you select the image and click Next, PhoneRescue will download the iOS image and then install it on your device. After the process is completed, your device should be able to boot up normally.
Depending on whether you chose Standard or Advanced Mode, you might need to set up your iPhone and iPad as a new device or get it back in its previous state without losing any data.
Remove Lock Screen Passcode
This feature allows you to remove the lock screen passcode (if you’ve forgotten it) from your iPhone or iPad with a few simple steps.
Note: The process will erase all data on your device, and you need to enter the password for the Apple ID that you’re currently logged in on the device.
PhoneRescue will guide you to put your iOS device in Recovery Mode, and then download the lastest available iOS System Image for your device. On the next step, PhoneRescue will install the downloaded system image on your device.
Hereafter, you need to complete the process on your iOS device. When required to do so, enter your current Apple ID password and proceed with the setup process. In the step where it asks you to select a data restore option, choose either local or iCloud backup depending on where you have stored it. Alternatively, you can just set it up as a new device.
Remove/Recover Screen Time Passcode
Screen Time is a great feature to monitor how much time you spend on your iOS device. It also allows you to restrict access to specific websites or apps depending on specific conditions. To prevent unauthorized access to these settings, you can set up a Screen Time Passcode.
But sometimes, you may forget the Screen Time Passcode, and you can’t reconfigure these settings anymore. PhoneRescue can remove your Screen Time passcode.
The process is quite simple. You plug in the iOS device to your computer and choose Remove Screen Time Passcode under Device Rescuer in PhoneRescue. On the next screen, PhoneRescue will create a backup of your current device and analyze it to recover the screen time passcode. If you’re using encrypted backups, you need to provide the backup password for PhoneRescue to be able to analyze the backup.
Once the analysis is completed, PhoneRescue will recover the screen time passcode and display it on the screen (if you’re on iOS 12.4 or earlier) or remove it completely (if you’re on iOS 13 or later).
PhoneRescue Pricing
A trial version of PhoneRescue is available to download for free. The trial version has certain limitations; it allows you to scan your iOS device and preview potentially recoverable data, but to export the data, you need a full license.
PhoneRescue iOS Data Recovery is available in two different licenses. A single user, one year license is available for $49.99, whereas a single user lifetime license is available for $59.99.
Conclusion
PhoneRescue is a decent iOS data recovery solution, which has a sleek and elegant UI, provides a good experience, and is quite easy to use.
Apart from the data recovery options, the device rescue options, like iOS System Recovery, Device Passcode removal, and Screen Time Passcode Recovery, are handy too. Although, the last two features are also available in another software program from iMobie.
Give iMobie PhoneRescue a try, and if you like it, you can unlock the full software by purchasing a license.