If you use a lot of iOS apps, you might have come across a few of them which are not available for your country. Most of the time, this is a case with people living outside the US. A lot of apps are country-restricted and for use in the US only. Well, they have their own reasons for imposing these restrictions. Country specific laws often prevent usage of some products in other countries. It might also be the case that the services used by the particular app is not available for your country.
However, if you are an app-crazy power user, you might want to try out as many apps as possible regardless of your location. Today, we are going to show you how to install country-specific iOS apps from outside their restricted areas.
Note: In this tutorial, we’ll set up a US-based Apple ID from outside of US. You can similarly set up Apple IDs based on any country.
Accessing App Store Through iTunes
For purchasing and installing apps from the App Store for your iPhone, iPad or iPod Touch, the first step is to create and Apple ID. Many of you might have set up your Apple ID while setting up your iOS device itself. However, if you are going to install country-restricted apps, you will need to set up an Apple ID based on that particular country.
There are two possible ways to create an Apple ID: via iTunes (computer) or your via iOS device. Rather than using two accounts on your iDevice and switching between them frequently, you could create and use a second Apple ID from your computer (iTunes).
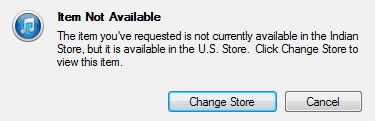
iTunes lets you browse through any regional App Store but in order to purchase/download apps, you need to be logged in with your Apple ID. As soon as you are logged in, you are automatically taken back to your region-specific App Store. If your Apple ID is not US-based, the US-only apps will be inaccessible to you.
Creating a US-based Apple ID
The usual process to create an Apple ID is by the clicking on the Store >> Create Apple ID. (You might need to unhide the Menu Bar first by pressing Ctrl + B.) Apple automatically detects your location from the Account details you provide, including your billing address and payment details (debit/credit card number, etc). However, in order to create a US-based Apple ID, we must somehow skip providing payment details (card information).
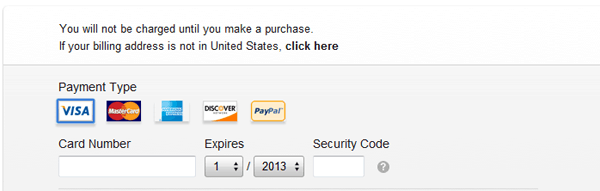
Many people who are familiar with the Apple ID creation process through iTunes, know that Apple has removed the “None” payment option from the registration form; thus mandating users to fill up their payment details before signing up for an account. There is however another way to sign up for an Apple ID without giving away payment information. The process we will use takes a slightly different approach, but it works perfectly. We will consider installing US-based apps here but the process holds true for other country specific apps as well.
Create US iTunes account without Credit Card
- Open App Store inside iTunes. Sign out of any account you may be logged-in to.
- Scroll down to the bottom of the page and click the circular flag near the bottom-right corner.
- Select your region as US.
- You will now be taken to the US App Store. Here, search for a free app you want to install.
- From the search results click on the Free button below the particular app.
- iTunes now prompts you to login with your Apple ID. Use the “Create an Apple ID” link in the prompt.
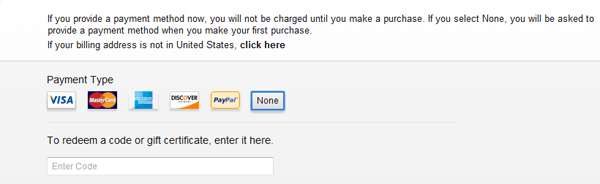
The ID creation wizard takes you through a familiar process where you accept the terms, set up your new account and provide a suitable payment method. Please remember your answers to the security questions in case you lose your password. The Payment details page, however, has an extra “None” option. So you can easily skip providing the payment information. The only way for iTunes to determine your resident location now is by your Billing Address. You may use a fake US address for this purpose.
Installing and using US-based apps on your iPhone, iPad or iPod Touch
Once your account is set up, you can simply login with your US-based Apple ID and download those country restricted apps locally on your computer and then sync them with your device.
- Connect your device to the computer. iTunes will initially sync your phone.
- Open your device menu (top right hand corner) in iTunes and open the Apps tab.
- You should see all your downloaded apps (including the US-specific ones) in the app list. Click on the Install button adjacent to it. The app will be installed on your device. If you see the Remove button instead of the Install, just sync your device and the app will be copied to your device.
There are no restrictions after the app is successfully installed on your device. You can use the app just as any other installed app on your iPhone, iPad or iPod Touch. However, since your device is synced with another account, you may not receive updates from these apps. But this should not be a problem since you can sync your device with iTunes and update them (where you can log in using your US-based credentials).
However, there’s still a limitation in this method. By setting up you US iTunes account, you will be able to download only the free apps. This is because you haven’t added a US based credit card to your account. If you still want to buy some US-only apps, there is a simple workaround.
Install US-based paid apps, movies and music from other countries
Though you can’t use a credit card for this purpose, there are a lot of online iTunes Gift Card Code offers that provide US based gift card codes that can be readily used in the App Store to make purchases (of course, these codes are not for free).
Purchase a suitable Gift Card code from any such website. After the purchase is successful, you should receive an email shortly containing the gift code.
Alternatively, if you know someone in the US who has an iTunes account, you may request him/her to send you a Gift Card.
- Open iTunes and login with your US-based Apple ID.
- The US iTunes Store will open automatically. On this screen, click on the “Redeem code” link on the right hand side.
- The next screen prompts you to enter your Gift Card code.
- Once you confirm the code, the gift amount will automatically be credited to your account.
You can now make purchases from the iTunes Store using the credit balance available on your account.